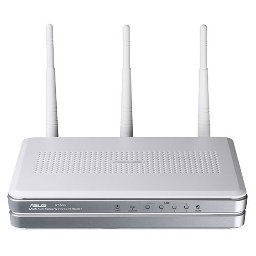
Why Tomato USB? For USB support. What is Tomato USB? It’s a USB enabled version of Tomato. It’s similar to DD-WRT. a third-party firmware for your router to give you advanced features not normally found in a consumer router (VPN, captive portal, etc). Why from Windows? There is already a good write-up on doing it from Linux. The ASUS RT-N16 is a pretty good little router, but for $75 USD you’d hope it would be. According to Wikipedia the RT-N16 sports a Broadcom BCM4718 SoC running at up to 533MHz with 128MB of RAM and 32MB of flash memory.
WARNING: Following these instructions may result in turning a perfectly good router into a useless brick. If you chose to continue, you do so at your own risk.
Start by downloading a copy of Tomato USB. Since the RT-N16 has a (relatively) big 32MB of flash you might as well go for the gusto and get the “VPN” version which is the “Ext” version with VPN support added. the “Ext” means “Extras”, so either Ext or VPN will give you plenty of bells and whistles.
Download Tomato USB here, I chose the “VPN” version under the heading “Kernel 2.6 (experimental) for MIPSR2 Routers”
Specifically I downloaded tomato-K26USB-1.28.9054MIPSR2-beta-vpn3.6.rar, but you’ll probably want whatever is most recent. You’ll also need a program to unRAR the archive, 7-zip is a fine choice.
Once unpacked you should have a file with the extension “.trx”, in my case my file is named “tomato-K26USB-1.28.9054MIPSR2-beta-vpn3.6.trx”
Once you’ve downloaded the file, plug your computer into the LAN1 port on the RT-N16.

Change your Windows settings to (or add) an IP in the 192.168.1.0/24 subnet.
In Windows XP, click “Start“, then go to “Settings” and chose “Control Panel”

Find the network icon, if you can’t see it you may have to switch into “Classic view” from the options in the left-hand side margin. Windows Vista, and 7 have the ability to set settings similarly, but the menus are buried in other locations.
![]()
Find your Local Area Connection, right click and choose Properties. Then scroll down to “Internet Protocol (TCP/IP)” and click “Properties”


Now put the RT-N16 into recovery mode, to do this press and hold the “Restore” button on the back of the router while you plug the router into a power outlet.

The “Power” light should be flashing if you did it right, if not try again.
Open a command prompt, click the Windows “Start” button again and go to “Run” (or hit the windows key on your keyboard and ‘R’ at the same time). At the “Open” prompt type “cmd.exe” and click “OK“.

Test to see if you can ping the router in recovery mode, you should see “Reply from…” not “Request timed out“.
Pinging 192.168.1.1 with 32 bytes of data:
Reply from 192.168.1.1: bytes=32 time=11ms TTL=64
Reply from 192.168.1.1: bytes=32 time<1ms TTL=64
Reply from 192.168.1.1: bytes=32 time=1ms TTL=64
Reply from 192.168.1.1: bytes=32 time=1ms TTL=64
Ping statistics for 192.168.1.1:
Packets: Sent = 4, Received = 4, Lost = 0 (0% loss),
Approximate round trip times in milli-seconds:
Minimum = 0ms, Maximum = 11ms, Average = 3ms
Move to the location where you extracted the “.trx” file from the RAR archive. If this is your Desktop then “cd Desktop” might do it.
C:\Users\chris\Desktop\>
Flash the router with the new firmware using the tftp client built into Windows.
Transfer successful: 6602752 bytes in 14 seconds, 471625 bytes/s
It’s very important that you include the “-i” after “tftp”, this switches the transfer into binary mode, it will mung your transfer otherwise and potentially brick your router.
Wait a minute after the transfer has completed to let the router apply the firmware. If everything worked right, the router should no longer be responding to ping requests
Pinging 192.168.1.1 with 32 bytes of data:
Request timed out.
Request timed out.
Request timed out.
Request timed out.
After waiting, reboot the router by unplugging it from power and then plugging it back in again. After a moment you should be able to connect to the router using a web browser at http://192.168.1.1. The default username and password are “admin” (for both username and password).

EDIT: Some builds of DD-WRT have USB support (enabled under “Services”). Ultimately I ended up running dd-wrt.v24-18777_NEWD-2_K2.6_mega.bin, which was easy to flash to as an “Upgrade” within TomatoUSB’s web GUI.
Leave a Reply