An aging Dell Vostro 1000 ended up on my desk the other day. The owner said it had died, when he turned it on some LEDs lit up, but there was no display. It turned out that the backlight which illuminates the LCD panel was not working. This is a common problem with older laptops. A bright flashlight aimed at the screen revealed the ghostly faint image of a Windows desktop struggling to be seen. The backlight is actually an edge light that illuminates a panel behind the LCD screen. On older laptops and LCD monitors this is a compact florescent light (CFL). Many newer displays use LEDs as the light source. A CFL is kind of a miniature version of florescent office light tubes. Just like florescent office lights needs a high voltage ballast to excite the gasses in the tube, a CFL needs an “inverter”. The backlight inverter is by far the more common failure point in an inverter & CFL system. Replacement kits with both the CFL and inverter for most laptops are available on eBay, but I’d recommend just trying the inverter board to start with. The cost is usually less than $5 shipped.
Since I was stuck repairing this dinosaur, I figured I’d document the process for the benefit of anyone else finding themselves in a similar situation.
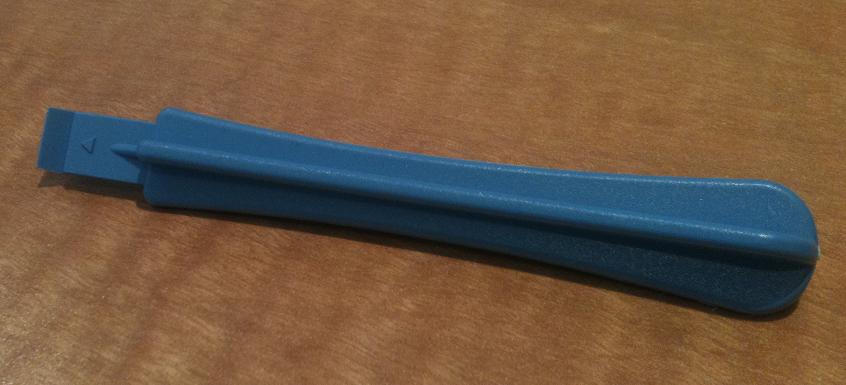
You’ll want to gather some tools, a small Phillips-head screw driver, a small flat-head screw driver or spudger, some double-sided tape and a pry tool.
Pry tools are nice for opening plastic enclosures of electronics as the soft plastic of the pry tool often gives way before the work material which helps to prevent marring the device. Pry tools can be picked up for cheap on eBay. Guitar picks are also useful for this purpose.
First, remove the battery from the laptop to prevent accidental powering on the device while working with it.
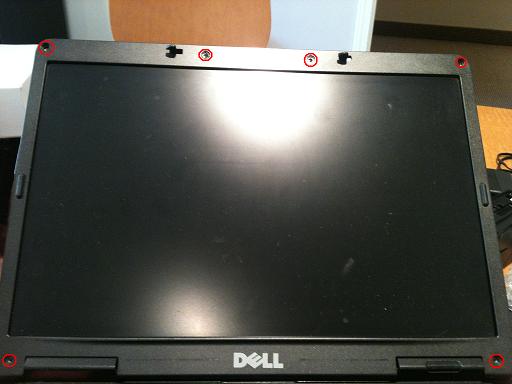
Carefully pry off the rubber bumpers covering the screws on the LCD bezel. I used a small flat-head screw driver. I attempted to insert the screw driver head under the edge of the rubber bumpers to prevent tearing them. If you’re lucky you’ll take the adhesive material with you. If not you’ll need to replace the adhesive with a small bit of your double-sided tape later. Do not glue these back in place, it will be a mess and whoever opens the screen next will curse your name.
Locate and remove the rubber bumpers and screws and the indicated locations.
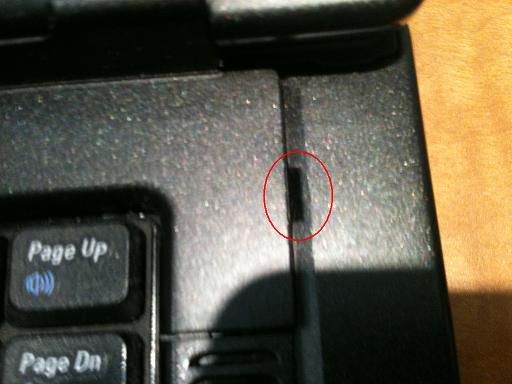
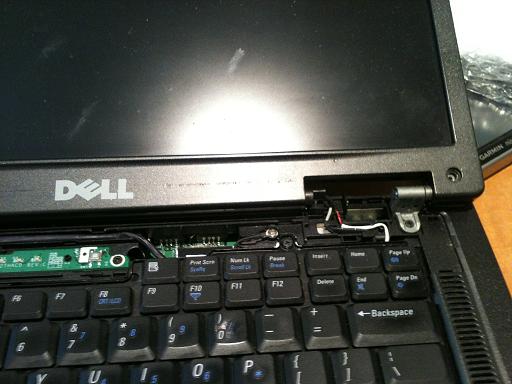
Locate the gap in the upper right area above the keyboard, this will make a good pry point to begin loosening the bezel with the power button on it.
Using a firm, but not forceful prying or subtle twisting action of the pry tool, you should feel the bezel loosen as you move along the perimeter. Continue to work around the bezel as shown
The bezel is now off exposing some screws, however we don’t need to do anything with those screw. This piece was removed to make it easier to access the monitor bezel.
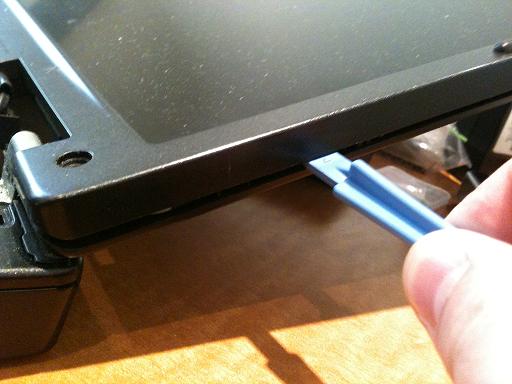
Work the pry tool into a separation in the LCD bezel. I worked around the frame twisting the pry tool slightly, and the front came off without a problem.
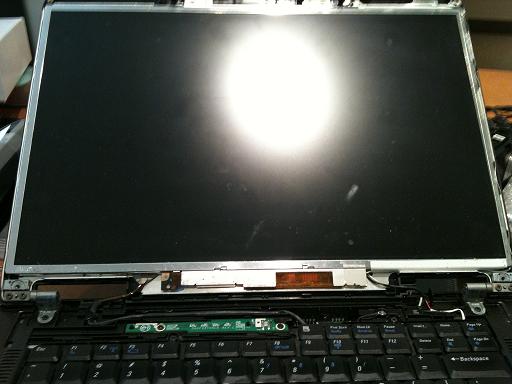
The LCD bezel should be off now.
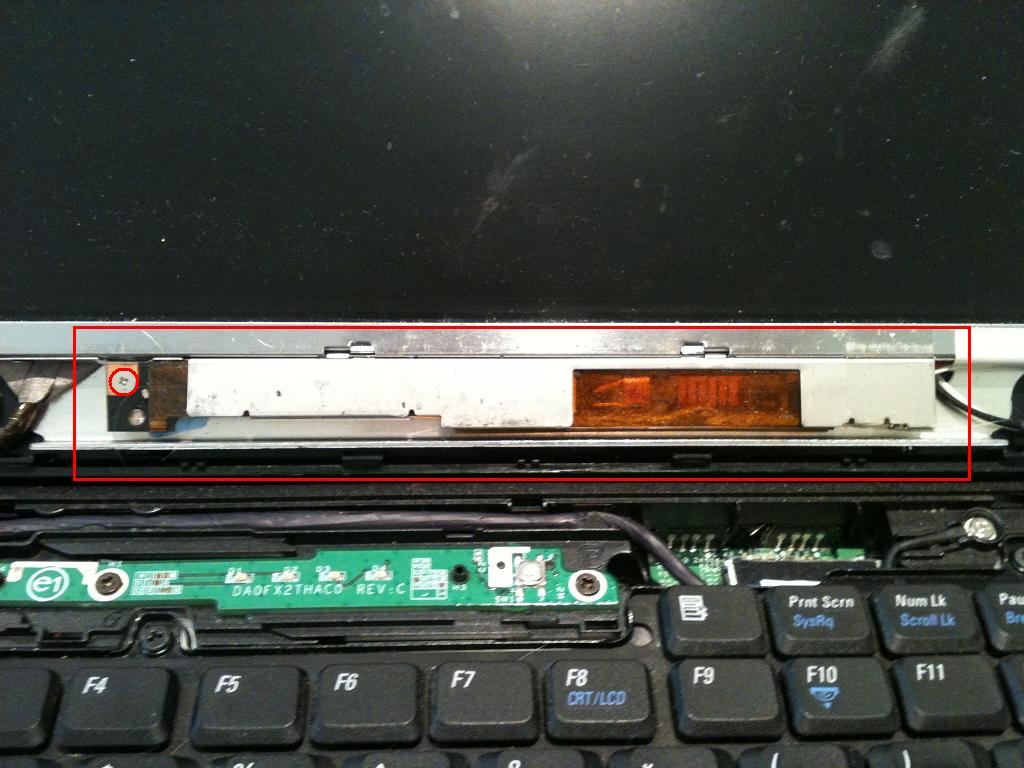
We can see the back of the inverter (in the red square). Remove the single screw holding the inverter in place (shown in the red circle).
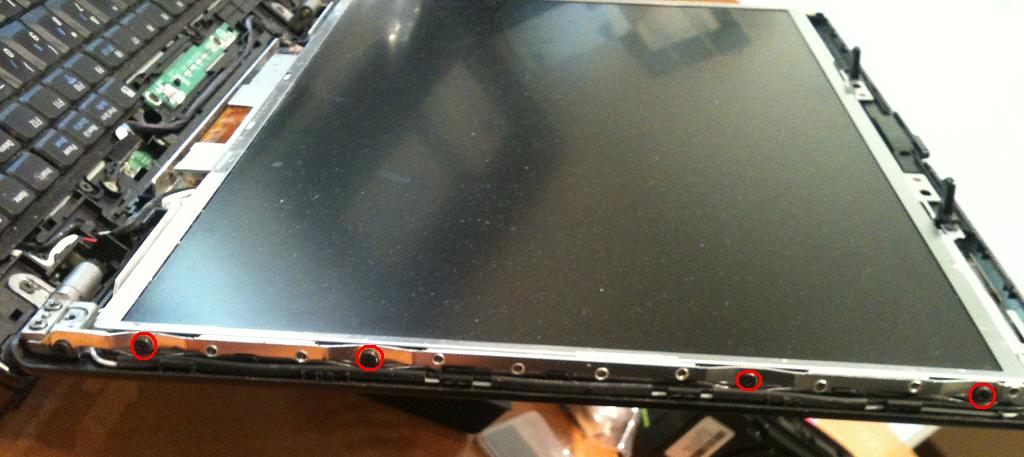
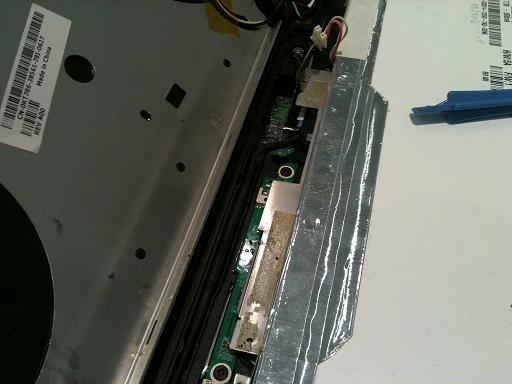
Look on the left and right edges of the LCD panel. There are screws attaching the panel to the rest of the screen assembly that will need to be removed. The right side is shown with the screws of interest circled in red.
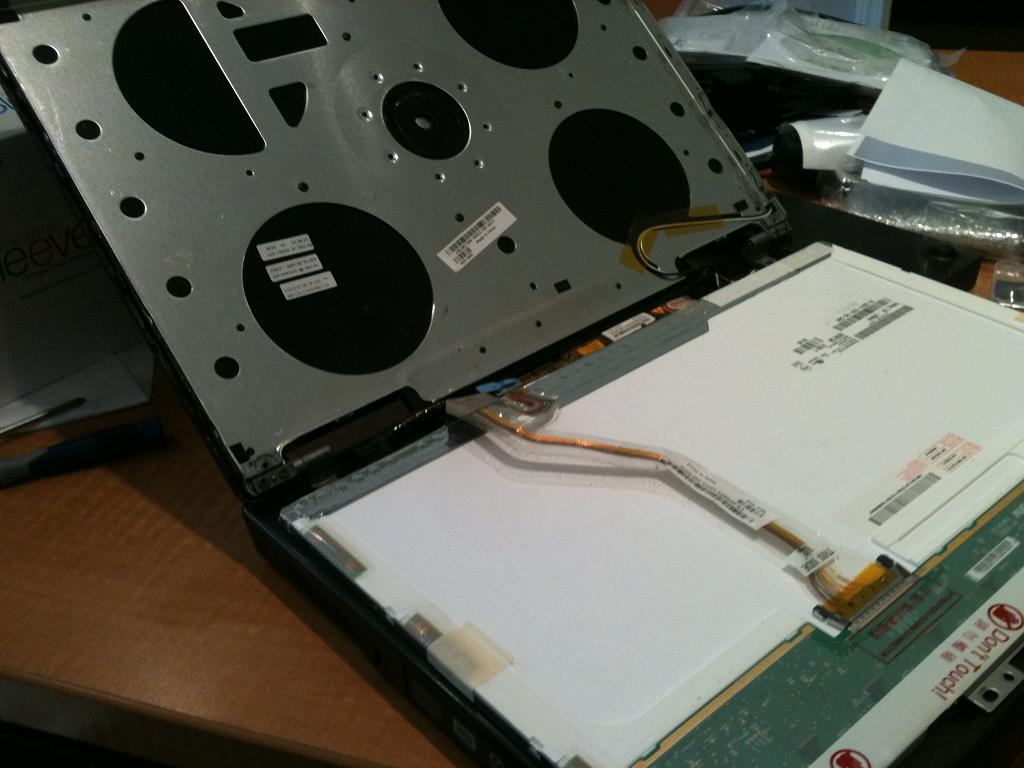
With the screws removed from each side, find the two metal tabs near the top of the LCD panel. They make a useful point to carefully grip the LCD panel and flip it downward gently onto the keyboard as shown.
Remove the new inverter from it’s packaging, and verify that the part correctly matches the old inverter.
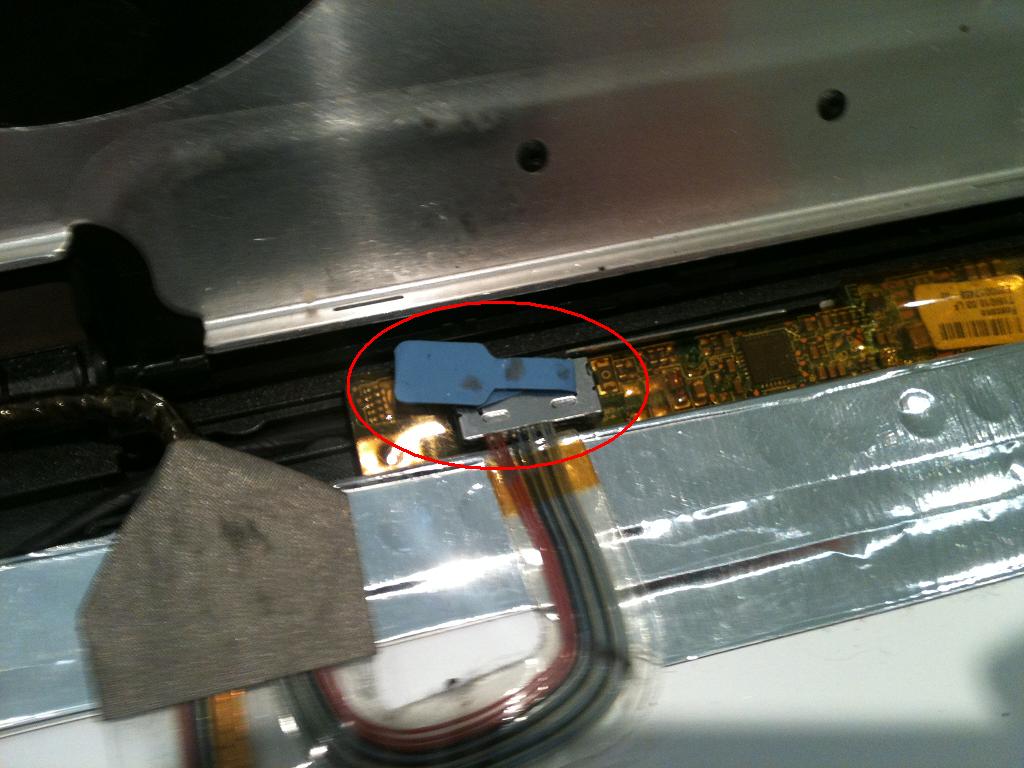
The control connector for the inverter board is shown below (circled in red). Carefully pull upward on the blue tab to free the connector from the board.
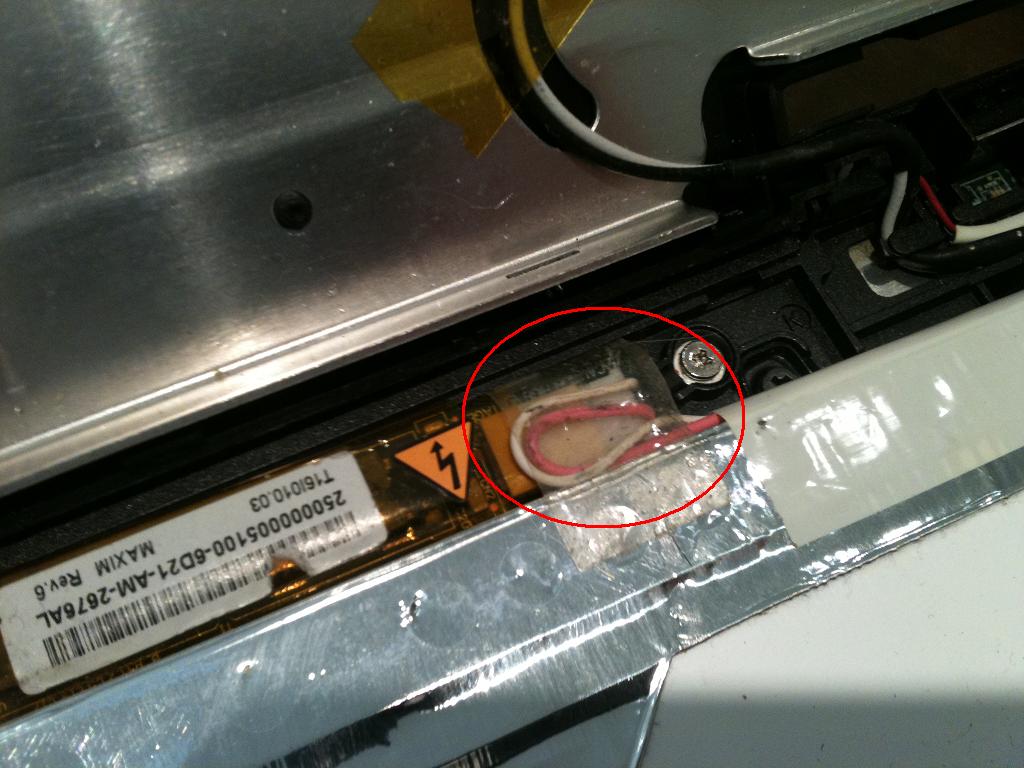
On the other side of the board, unplug the high voltage power feed.
The inverter will take some work to free, as there is some strong double-sided tape found underneath.
Replace the double-sided tape if necessary, then insert the new inverter. Carefully flip the LCD panel back up into position and secure with the screws you removed earlier. Don’t forget to reinsert the small screw that holds the inverter in place. Reattach the LCD bezel, it should snap back together with light pressure.
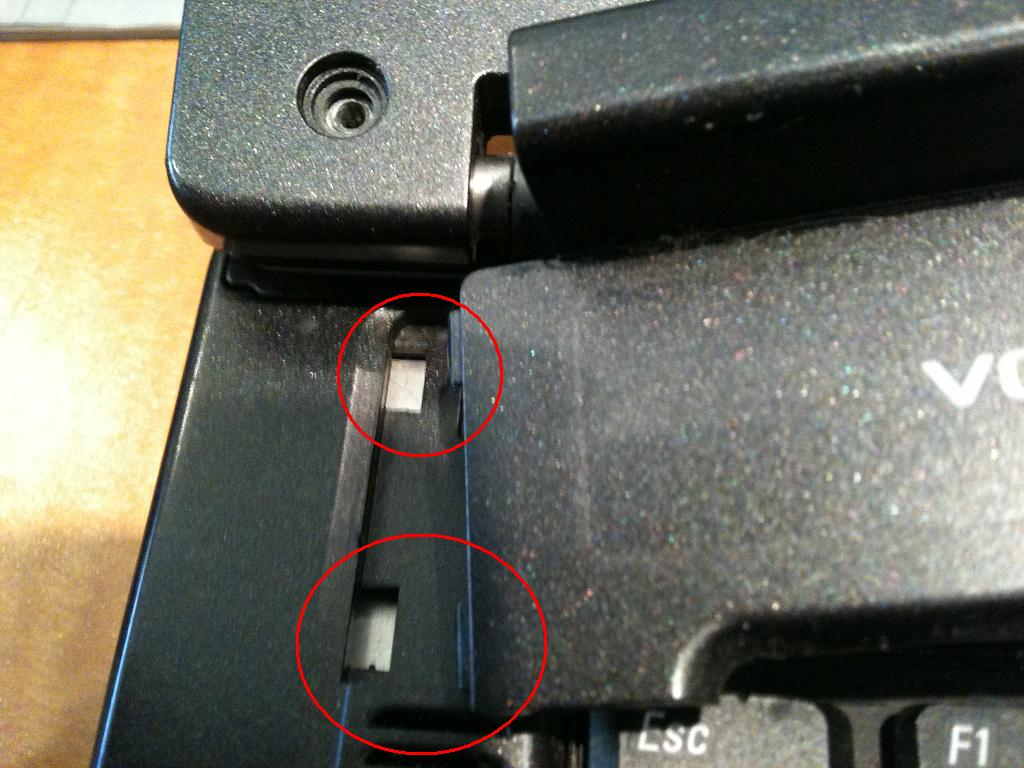
When reattaching the bezel with the power button, insert the left-hand side first. There are two tabs that must be inserted under the slots (shown circled in red).
Replace the screws on the LCD bezel front. Add a small amount of double-sided tape if necessary to the rubber bumpers to secure them back in place.
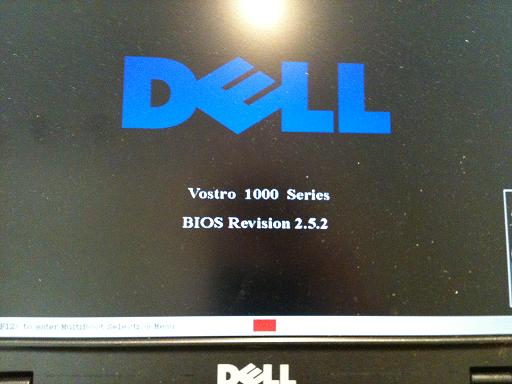
Reinsert the battery and power on the laptop. If everything worked out, you should have a working backlight again. If the problem persists you may have purchased a bum backlight inverter or the CFL might have actually died, in which case maybe it’s time to break down and buy a CFL & backlight kit. or just get a new laptop.




Leave a Reply to Chris Cancel reply