Category: Hacks

  • Phone Phreak Silver Box

    Phone Phreak Silver Box

    How many Touch-Tone digits does your landline have? 12 ? …That’s so pedestrian.

    If you’re a phone geek you might know about the old military AUTOVON phone system.

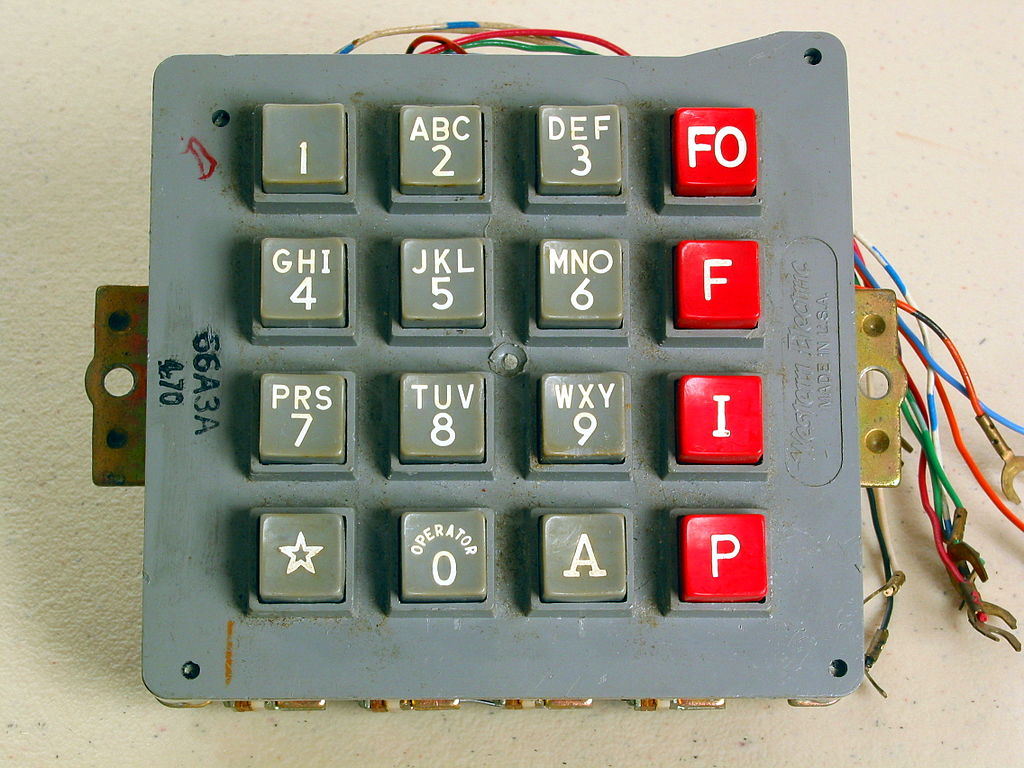
    These phones added 4 additional digits, that could be used to indicate the urgency of the call.
    P for priority, I for immediate, and F for flash

    If all the lines were tied up, and you were an important enough person with an important enough call, there was also FO, Flash Override. Ooh, that sounds cool, other calls be damned, we need to tell SAC to recall those bombers STAT!

    Each button on a Touch-Tone dial produces a different tone. Technically each button produces not one, but two different tones

    Touch-Tone dialing is part of something we call DTMF, dual tone multi-frequency signaling

    This makes it easier for equipment to detect key presses. Background noise, or even the sound of someone’s voice might trick a tone detector into thinking it has one of the tones, but it’s far less common to falsely detect the presence of both tones at the same time.

    The dual tones of DTMF come from the combination of a row tone and a column tone. Each column produced one of the two tones, and each row produced the other

    For example, the numbers 1, 2, and 3 all share the frequency 697 Hz in common and the numbers 2, 5, 8, 0 all share 1,336 Hz in common but only the number 2 is made up of both 697 Hz and 1,336 Hz

    AUTOVON used an extra column of 1,633 Hz to add the additional four buttons.

    This 4th column isn’t exclusive to AUTOVON. It may not be common, but it can be found in use in various telecommunications applications. For instance AMIS, the Audio Messaging Interchange Specification (which is used to transmit voicemail messages between different systems) uses these additional 4th column tones.

    When these fourth column buttons are used outside of AUTVON we usually refer to them as, A, B, C, and D (rather than FO, F, I, and P respectively)

    Imagine what you could do with an extra set of digits. Maybe add an extra layer of obscurity to your voicemail password, no more 1234 for me, but maybe 123ABC ? Add secret debug menus to your interactive voice response menus and Asterisk Gateway Interface scripts. Unlock an extra octave in your DTMF song performances. Exciting stuff.. surely.

    You can sometimes find old AUTOVON phones on eBay, but they generally go for more money than I’d consider spending.

    Are you sensing a project? You’re right!

    Phone phreaks have used various gizmos over the years to produce tones and explore or just rip-off phone networks.

    Possibly in tribute to Steve Wozniak‘s little blue box that allowed him to explore the in-band signalling of the long distance trunk lines of yesteryear, these devices were commonly called boxes, and the purpose of the device was identified by a color.

    There’s a whole rainbow of colored boxes out there, for example If you were tricking a payphone into thinking you just deposited a quarter you were red boxing.

    One of these so-called boxes was the Silver Box, a device to generate these 4th column tones.

    One of the simplest versions of the silver box involved modifying an existing phone by adding a toggle switch to switch the last column 3, 6, 9, # from 1,477 Hz to 1,633 Hz. If you were lucky enough your phone might even have a local oscillator generating the 1,633 Hz tone (if not, you’d need to create a circuit to generate it).

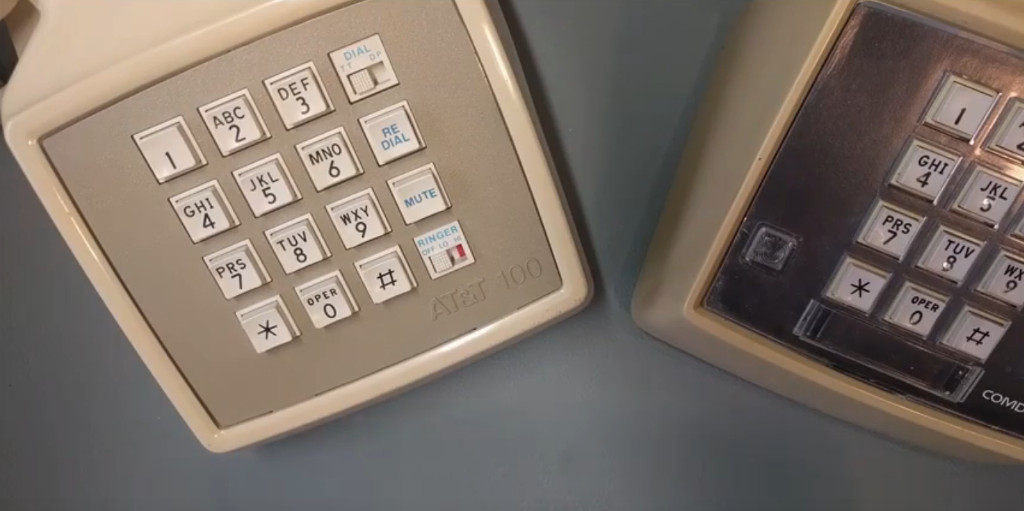
    To make my silver box I’m going to combine the best parts of to two different phones

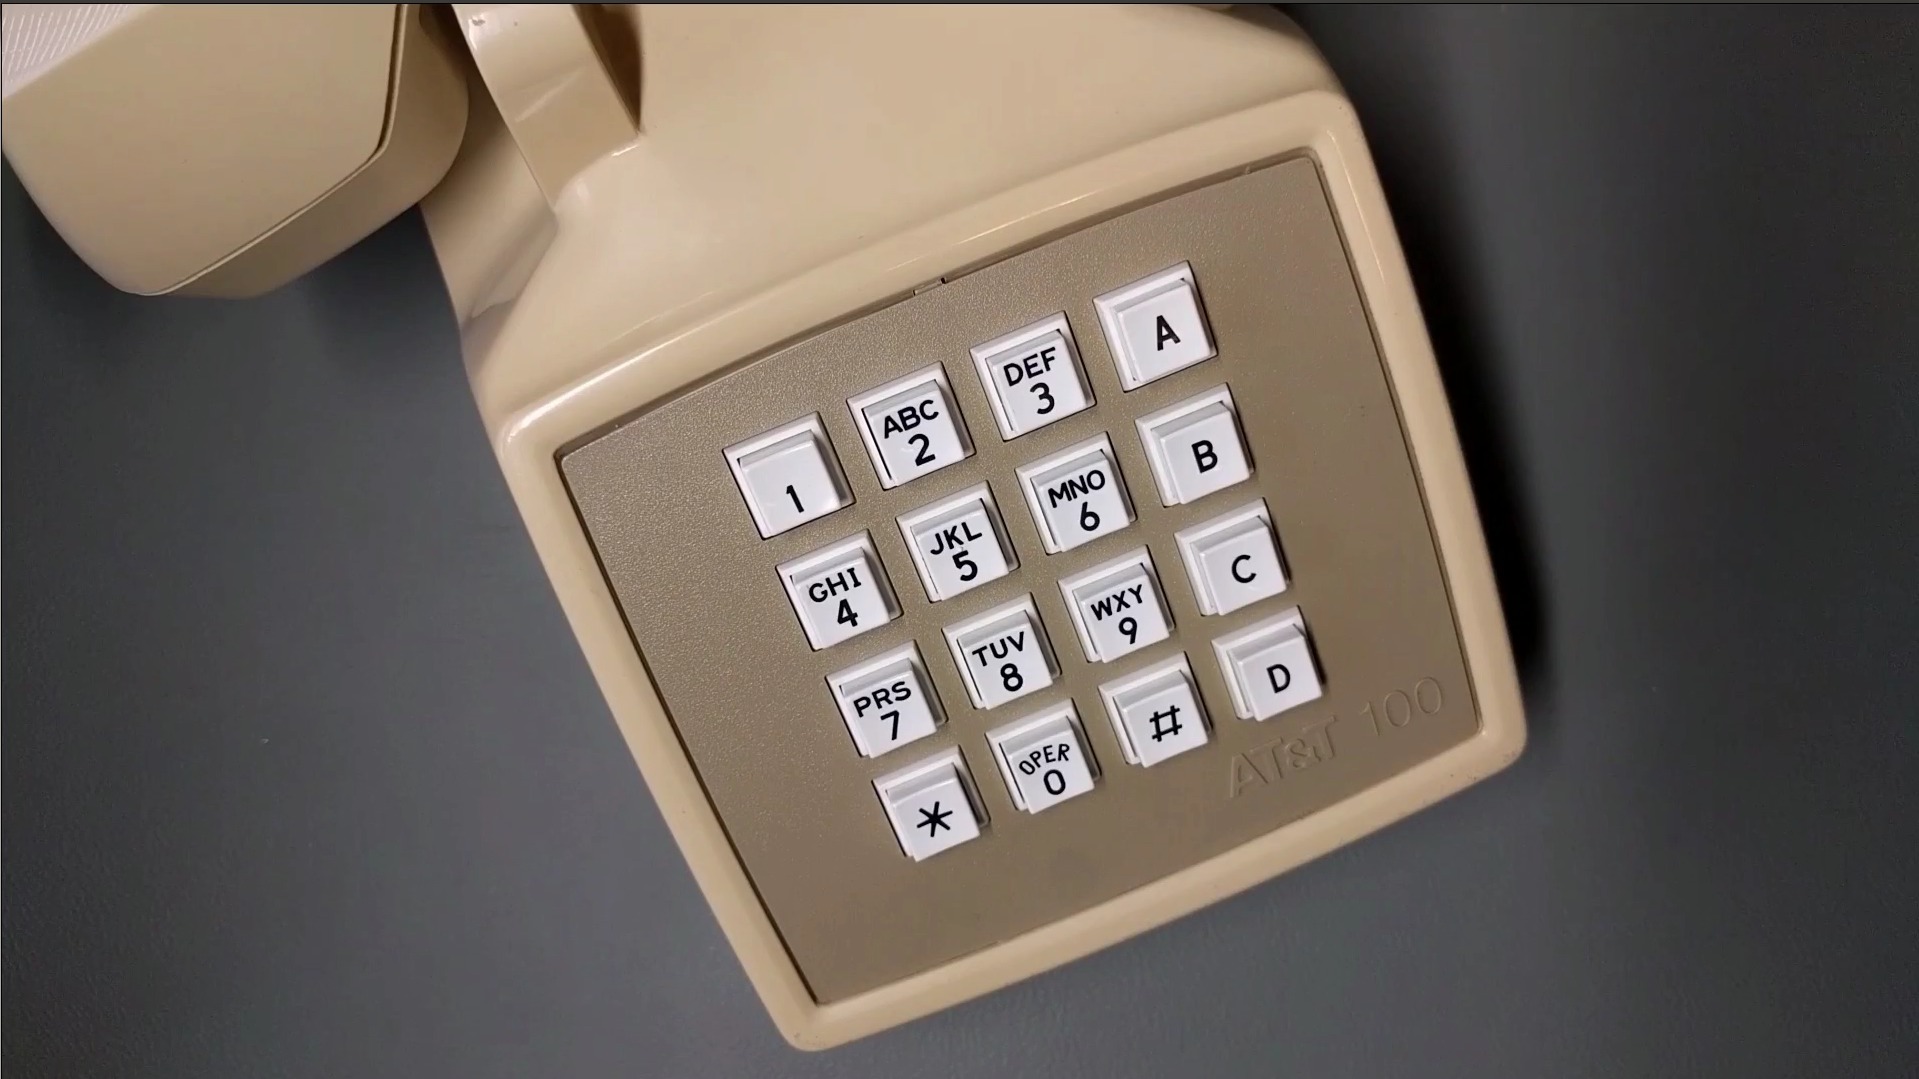
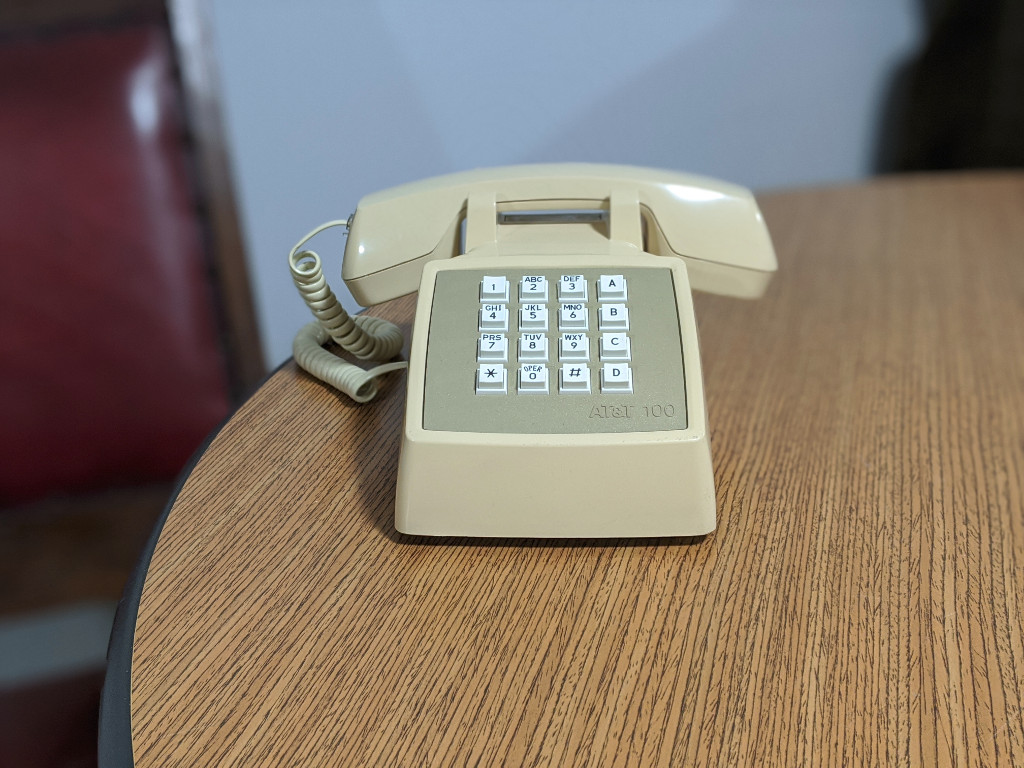
    On the left is an AT&T Traditional 100, it’s going to be the body of my phone, and I’ll be using most of its original electronics. The idea for this project came while I was looking at a picture of this phone. I thought, “huh, this extra column of buttons and switches over on the right looks evenly spaced and sized with the other buttons. I wonder if I could replace the keypad without having to modify the the phone.

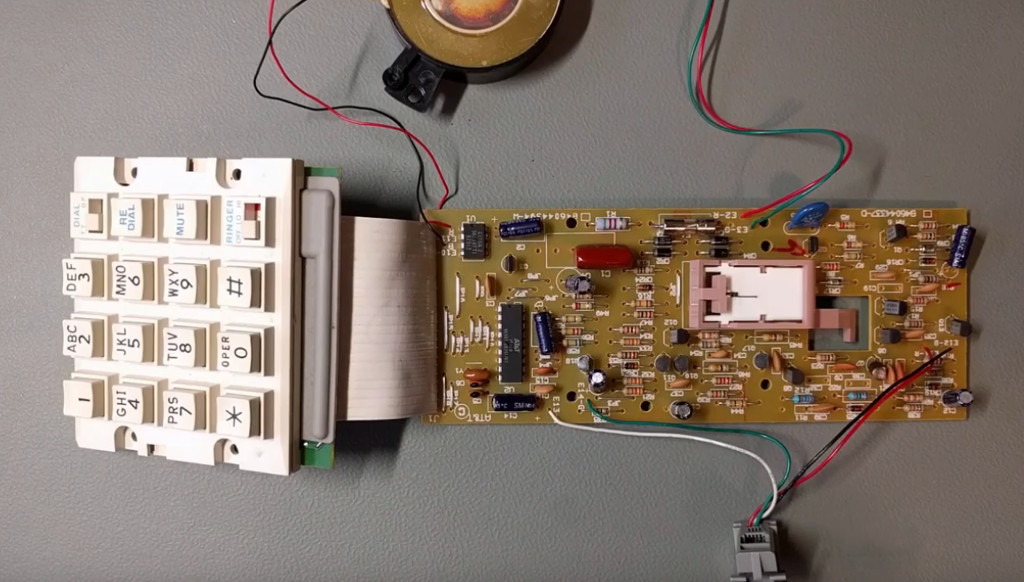
    On the right, is a COMDIAL 2579 (or at least I think that’s the model number). I’m going to be using some of its dialing guts for the project, to see why, lets take a closer look.

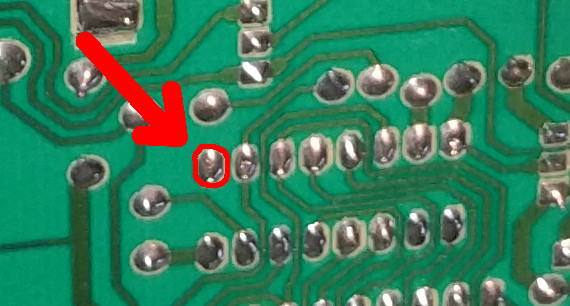
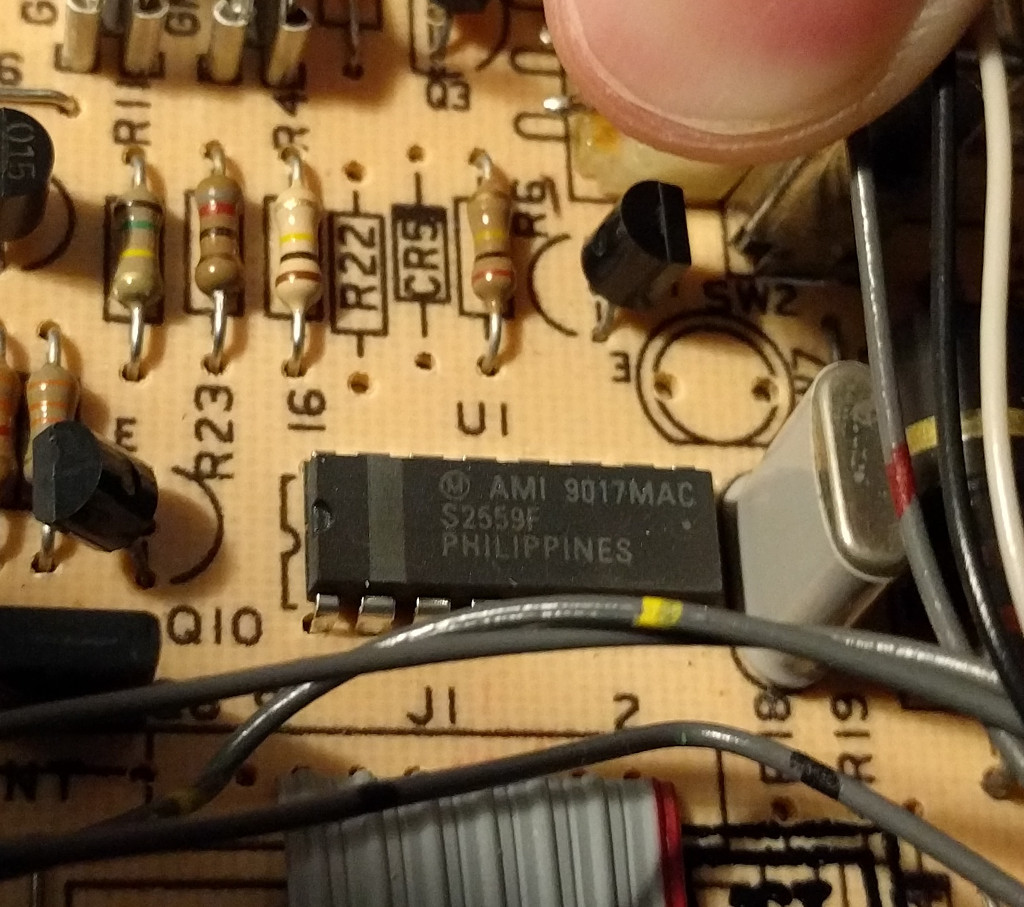
    Popping the top off the phone we can see a 16-pin DIP IC soldered to the PCB. One of the pins doesn’t appear to have any traces drawn to it.

    Here is a closer look at that DIP layout

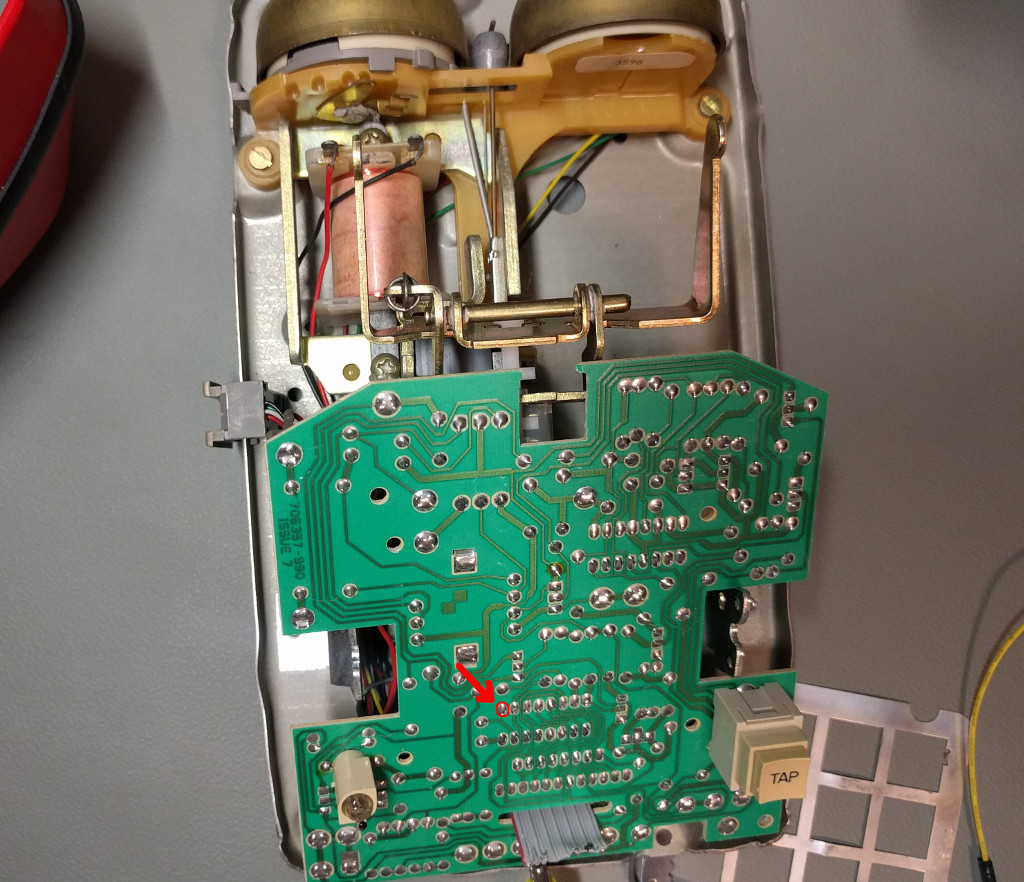
    Removing the PCB and flipping it over we can get a closer look at that IC.

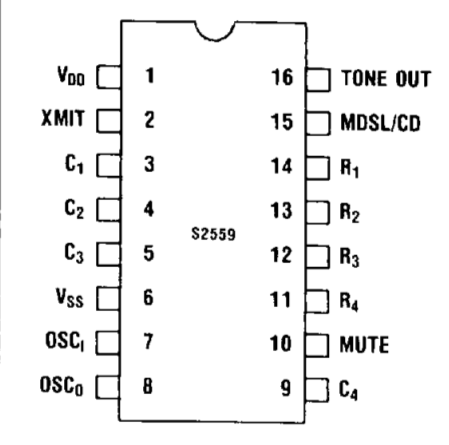
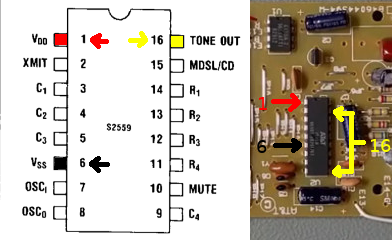
    It’s labeled AMI S2559F (American Microsystems Incorporated). Searching for the product datasheet online gives us the pin-out. We can see that pin 9 that wasn’t connected to any traces on the PCB corresponds to C4 (column 4).

    I removed this chip and the required (common 3.58 MHz TV crystal) oscillator (connected to pins 7 & 8) from the COMDIAL PCB and transplanted them onto a piece of perfboard.

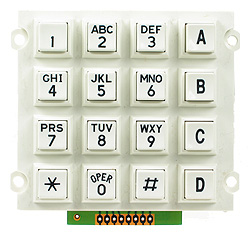
    There are a lot of 4×4 keypads out there, but the one I bought came from Futurlec. I like this one because it looks like it belongs on a phone (it has the traditional letters above the numbers, and OPER above the 0 key). I wired it up to the pins of the S2559F using AMI’s datasheet.

    I used a multimeter set in continuity testing mode to identify how to wire up my keypad.
    Pin 1 of the keypad corresponded to the 2nd row (4, 5, 6, B). Pin 2 to row 3 (7, 8, 9, C), Pin 3 to column 1 (1, 4, 7, *), Pin 4 to row 4 (*, 0, #, D). Pin 5 to column 2 (2, 5, 7, 9, 0). Pin 6 to column 3 (3, 6, 9, #). Pin 7 to column 4 (A, B, C, D). Pin 8 to row 1 (1, 2, 3, A).

    _______
    1|2|3|A| Pin 8
    4|5|6|B| Pin 1
    7|8|9|C| Pin 2
    *|0|#|D| Pin 4
    ——-
    3 5 6 7 <-Pins

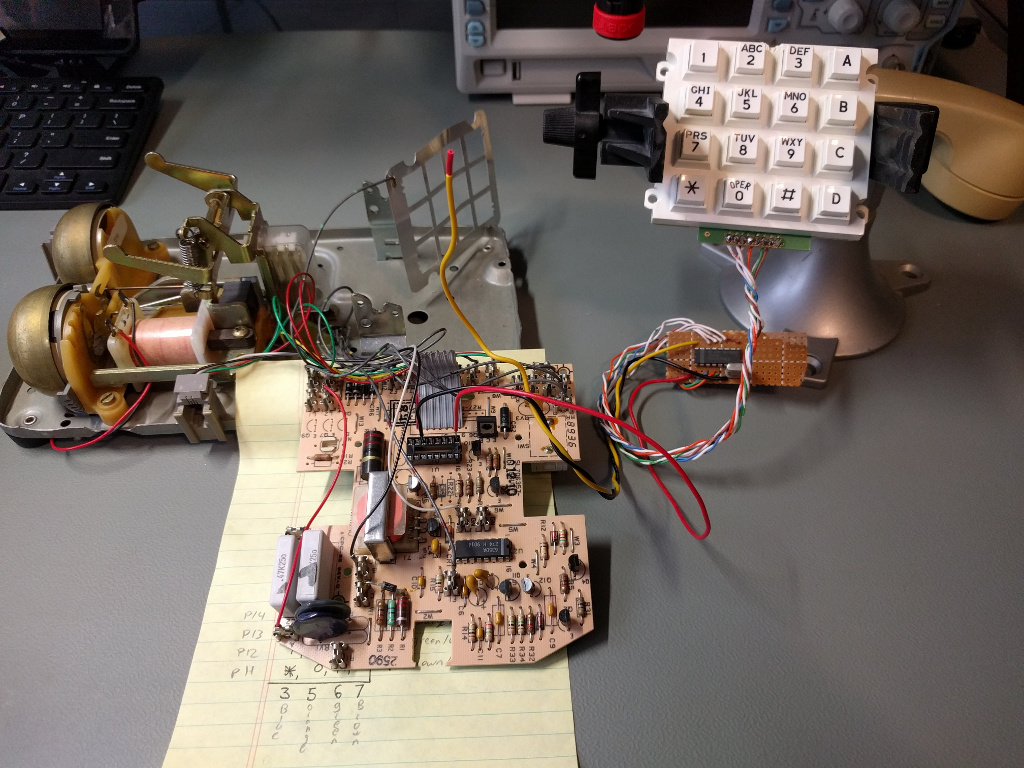
    After successfully testing the circuit connected to the COMDIAL PCB I began working on integrating the perfboard and keypad into the body of AT&T Traditional 100.

    I removed the AT&T Traditional 100 PCB from its housing and removed the 18-pin IC to begin work on guessing the pin-outs. Unfortunately this IC is pretty uncommon, and I wasn’t able to find a datasheet to help me along.

    On pin 1 (VDD) of the AT&T 18 pin IC I found sufficient voltage for the S2559F. According to the datasheet, to operate (generate a tone) the S2559F needs around 2.5 VDC, but can work with as much as 10 VDC. Pin 6 (VSS) seemed to be a good ground. To get a tone to play I needed to bridge pins 10 & 17 (TONE OUT) and inject the tone-out pin of the S2559F to that connection.

    Here is an illustration of how I hooked it up

    This all seemed to work pretty well, and I’m happy with the results even if I don’t really have that much use for the phone itself. I suppose if you are going to keep a landline around the house, might as well keep an interesting one.

    I suppose it might not be totally correct to call this a landline. I have it connected to an analog telephone adapter for VoIP (that I own). You probably don’t want to go about connecting hacked up telephony equipment to lines that aren’t your own. In some jurisdictions this might even be illegal (oh, that sounds like a disclaimer! old school. Nice).

    Have Phun!

  • Symantec Endpoint Recovery Tool (SERT) Pin Number (All of Them)

    Symantec Endpoint Recovery Tool (SERT) Pin Number (All of Them)

    The Symantec Endpoint Recovery Tool (SERT) is a great concept, it puts the power of Symantec’s Endpoint Protection antivirus scanning onto a bootable CD. If you are familiar with rootkits, you can probably see where this is useful. To scan a file for viruses an antivirus scanner makes a request to the operating system for the contents of the file. Sophisticated forms of malicious software (malware) can intercept this request. Instead of the system returning the contents of the virus to the scanner, benign data is returned instead and thus detection by the antivirus software is avoided. A rootkit can only be effective at intercepting requests while it is running in the system. By booting from a “Live CD” a rootkit-free operating system can be used to perform the antivirus inspection. A similar idea utilizing the open source ClamAV antivirus scanner can be found in the OpenDiagnostics Live CD. EDIT: Readers might also find the AVG Rescue CD of interest.

    Now that I’ve said some nice things about Symantec, let us get to the crux of this article.

    “The expiry is by design.”

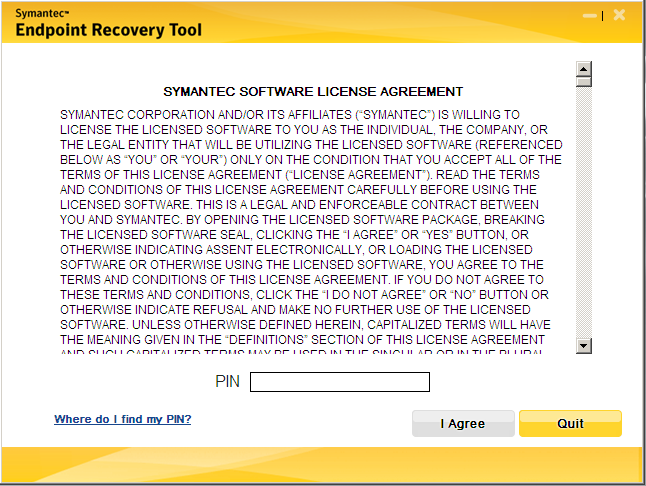
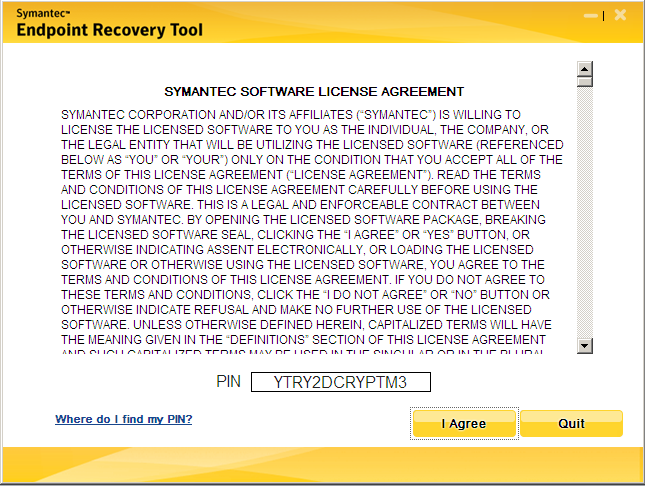
    The Symantec Endpoint Recovery Tool has developed a nasty trait of asking for a “PIN” before it will begin a scan.

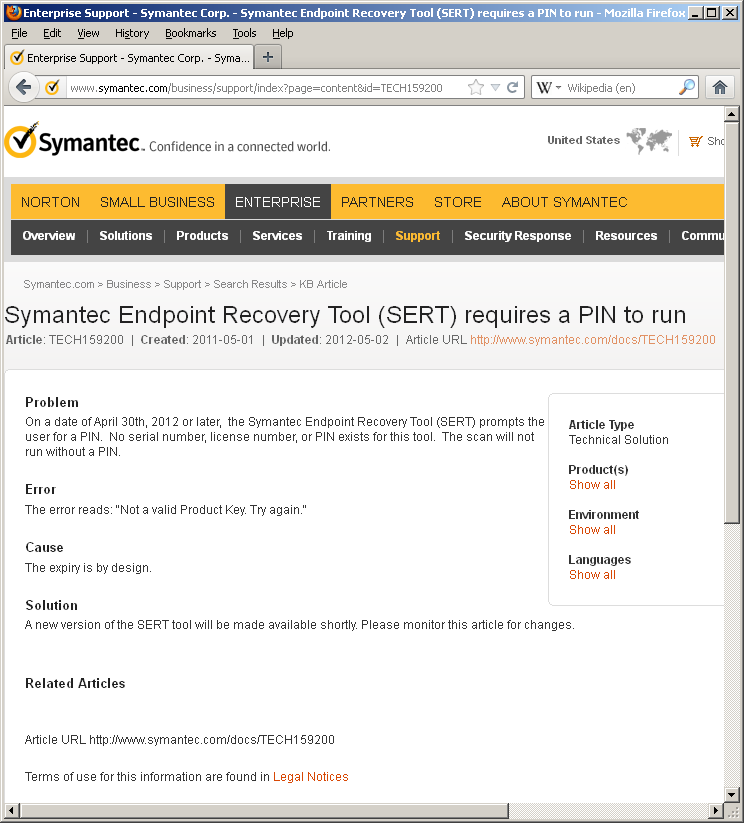
    According to Symantec this issue occurs whenever the SERT software is used post-April 30th, 2012. Instead of acknowledging this as a bug, Symantec asserts this annoyance is “by design”.

    http://www.symantec.com/business/support/index?page=content&id=TECH159200

    I have a hard time believing this claim. There is no reason given as to why this “feature” would possibly be intentional. According to the KB article, “No serial number, license number, or PIN exists for this tool”. If the intent was simply to expire the software I would have expected an error to that effect not a prompt for an imaginary pin number. Why ask for something that should “by design” never exist? If the expiry date was built-in because of licensing issues, or to get people to upgrade for some other reason shouldn’t there be a replacement release of this software ready to go prior to the April deadline? This might make a little bit of sense if the idea was to kill off SERT unceremoniously, but the KB goes on to say “A new version of the SERT tool will be made available shortly”.

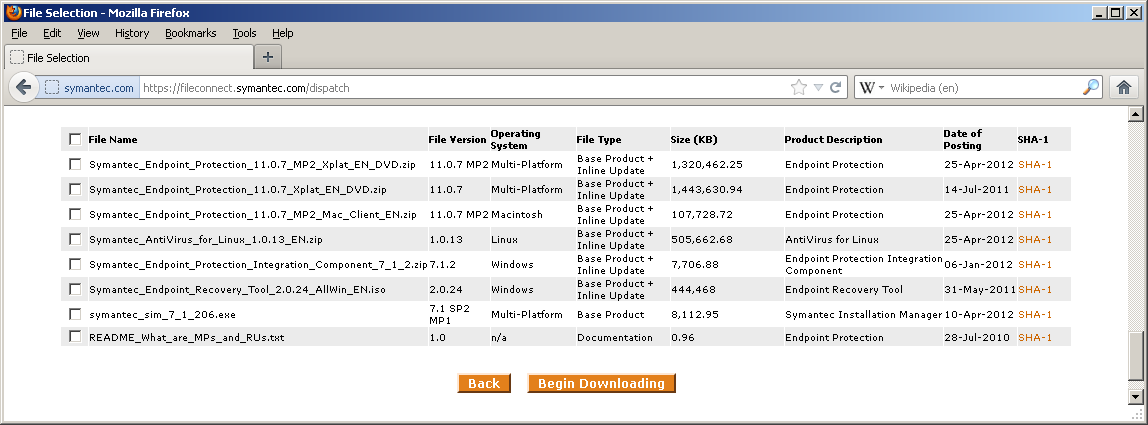
    A quick check of File Connect did not show me any suitable replacement candidate

    The latest SERT ISO available to me continues to be the (apparently) deprecated Symantec_Endpoint_Recovery_Tool_2.0.24_AllWin_EN.iso with the SHA-1 sum matching my existing copy (ded1b82350ecfe315896630feb04938aa48e22ee).

    Bug or not, someone goofed up. The alternative is that Symantec knew the software would quit working, chose to do nothing about it, and decided to be needlessly vague about the details.

    Continued use

    There are two ways to continue using the software, neither of which seem to be documented in the KB.

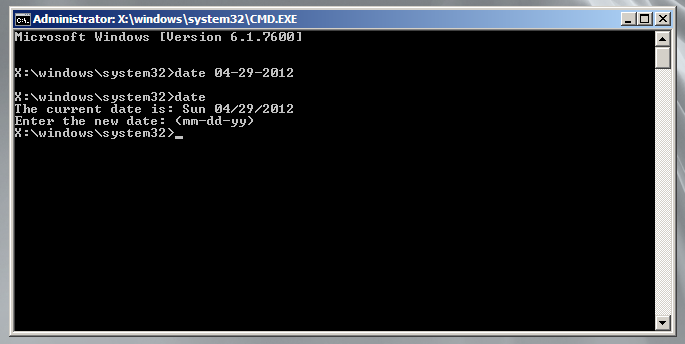
    The first method is the most obvious. If the software quits working after April 30th 2012, just set an earlier date on the system.

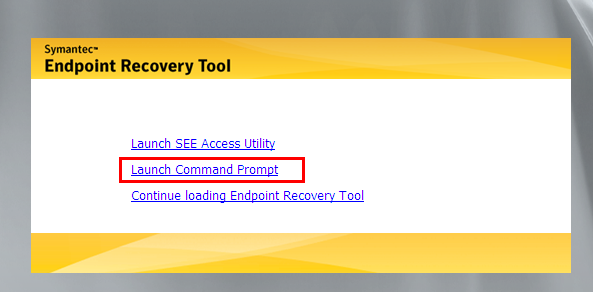
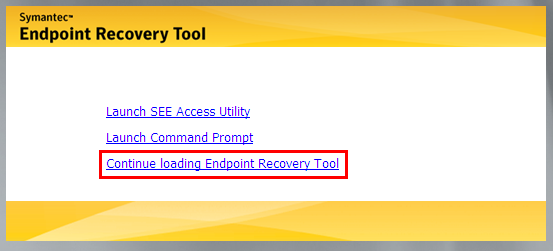
    During the normal flow of using SERT you are given an option to “Launch Command Prompt” before going into Endpoint Recovery Tool proper.

    Click “Launch Command Prompt”

    At the command prompt type “date 4-29-2012” and hit enter. Then type “exit” and hit enter.

    You should be back at the menu, choose “Continue loading Endpoint Recovery Tool”.

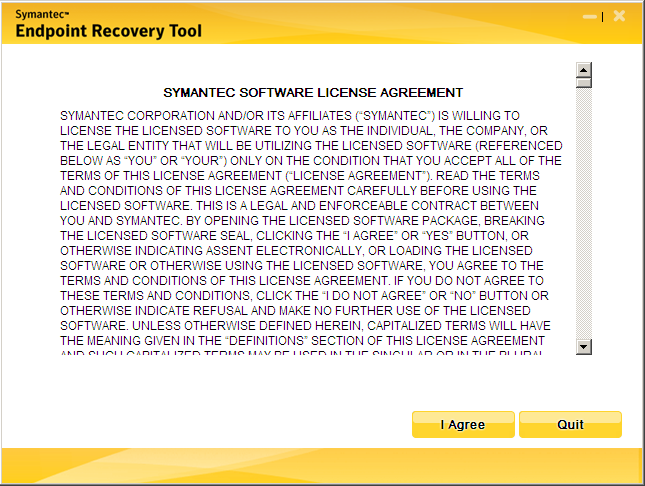
    You should now see the License Agreement as you normally would have seen it pre-April 30th, 2012.

    Method 2

    If by “No serial number, license number, or PIN exists for this tool” Symantec actually meant “No single serial number […]”, they would be correct, there are in fact very many of them. Continuing to make the “by design” argument more perplexing, the PIN code that should not exist does in fact exist, and is extremely easy to guess. I can’t help, but wonder what possible purpose this “design” had in mind.

    I started out spamming “1”‘s into the PIN field, which didn’t work, then moved on to “2”, which did work. I started making a list of the codes that worked for me.

    2222222222222
    3333333333333
    4444444444444
    6666666666666
    7777777777777
    8888888888888
    9999999999999

    Then I started playing with some variations. It didn’t take long before I realized what was going on.

    2222222222223
    3222222222222
    2346789234678

    Next, I started looking for characters other than numbers

    222222222222B
    222222222222C
    222222222222D
    222222222222F
    222222222222G
    222222222222H
    222222222222J
    222222222222K
    222222222222M
    222222222222P
    222222222222Q
    222222222222R
    222222222222T
    222222222222V
    222222222222W
    222222222222X
    222222222222Y

    So in the end, the PIN code is any combination of 13 of the following 24 alphanumeric characters
    {2, 3, 4, 6, 7, 8, 9, B, C, D, F, G, H, J, K, M, P, Q, R, T, V, W, X, Y}

    Interesting “design” Symantec.

  • Installing Tomato USB on Asus Routers (RT-N16 etc) in Windows

    Installing Tomato USB on Asus Routers (RT-N16 etc) in Windows

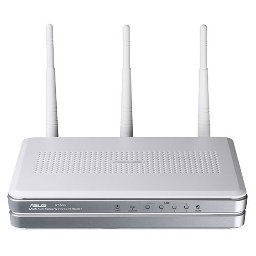
    Why Tomato USB? For USB support. What is Tomato USB? It’s a USB enabled version of Tomato. It’s similar to DD-WRT. a third-party firmware for your router to give you advanced features not normally found in a consumer router (VPN, captive portal, etc). Why from Windows? There is already a good write-up on doing it from Linux. The ASUS RT-N16 is a pretty good little router, but for $75 USD you’d hope it would be. According to Wikipedia the RT-N16 sports a Broadcom BCM4718 SoC running at up to 533MHz with 128MB of RAM and 32MB of flash memory.

    WARNING: Following these instructions may result in turning a perfectly good router into a useless brick. If you chose to continue, you do so at your own risk.

    Start by downloading a copy of Tomato USB. Since the RT-N16 has a (relatively) big 32MB of flash you might as well go for the gusto and get the “VPN” version which is the “Ext” version with VPN support added. the “Ext” means “Extras”, so either Ext or VPN will give you plenty of bells and whistles.

    Download Tomato USB here, I chose the “VPN” version under the heading “Kernel 2.6 (experimental) for MIPSR2 Routers”

    http://tomatousb.org/download

    Specifically I downloaded tomato-K26USB-1.28.9054MIPSR2-beta-vpn3.6.rar, but you’ll probably want whatever is most recent. You’ll also need a program to unRAR the archive, 7-zip is a fine choice.

    Once unpacked you should have a file with the extension “.trx”, in my case my file is named “tomato-K26USB-1.28.9054MIPSR2-beta-vpn3.6.trx

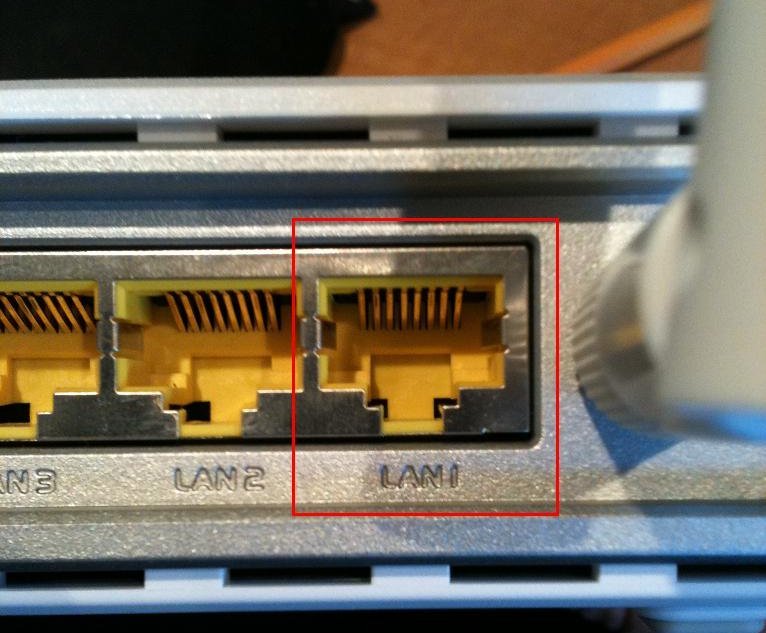
    Once you’ve downloaded the file, plug your computer into the LAN1 port on the RT-N16.

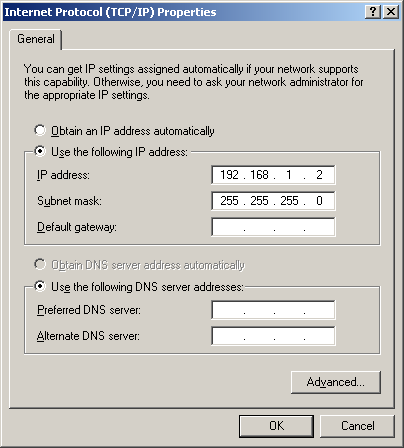
    Change your Windows settings to (or add) an IP in the 192.168.1.0/24 subnet.

    In Windows XP, click “Start“, then go to “Settings” and chose “Control Panel

    Find the network icon, if you can’t see it you may have to switch into “Classic view” from the options in the left-hand side margin. Windows Vista, and 7 have the ability to set settings similarly, but the menus are buried in other locations.

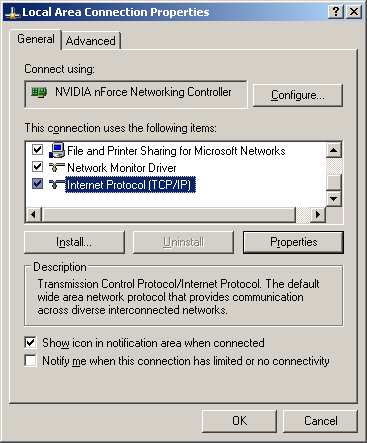
    Find your Local Area Connection, right click and choose Properties. Then scroll down to “Internet Protocol (TCP/IP)” and click “Properties

    Now put the RT-N16 into recovery mode, to do this press and hold the “Restore” button on the back of the router while you plug the router into a power outlet.

    The “Power” light should be flashing if you did it right, if not try again.

    Open a command prompt, click the Windows “Start” button again and go to “Run” (or hit the windows key on your keyboard and ‘R’ at the same time). At the “Open” prompt type “cmd.exe” and click “OK“.

    Test to see if you can ping the router in recovery mode, you should see “Reply from…” not “Request timed out“.

    C:\Users\chris\>ping 192.168.1.1

    Pinging 192.168.1.1 with 32 bytes of data:

    Reply from 192.168.1.1: bytes=32 time=11ms TTL=64
    Reply from 192.168.1.1: bytes=32 time<1ms TTL=64
    Reply from 192.168.1.1: bytes=32 time=1ms TTL=64
    Reply from 192.168.1.1: bytes=32 time=1ms TTL=64

    Ping statistics for 192.168.1.1:
        Packets: Sent = 4, Received = 4, Lost = 0 (0% loss),
    Approximate round trip times in milli-seconds:
        Minimum = 0ms, Maximum = 11ms, Average = 3ms

    Move to the location where you extracted the “.trx” file from the RAR archive. If this is your Desktop then “cd Desktop” might do it.

    C:\Users\chris\>cd Desktop
    C:\Users\chris\Desktop\>

    Flash the router with the new firmware using the tftp client built into Windows.

    C:\Users\chris\Desktop\>tftp -i 192.168.1.1 PUT tomato-K26USB-1.28.9054MIPSR2-beta-vpn3.6.trx
    Transfer successful: 6602752 bytes in 14 seconds, 471625 bytes/s

    It’s very important that you include the “-i” after “tftp”, this switches the transfer into binary mode, it will mung your transfer otherwise and potentially brick your router.

    Wait a minute after the transfer has completed to let the router apply the firmware. If everything worked right, the router should no longer be responding to ping requests

    C:\Users\chris\>ping 192.168.1.1

    Pinging 192.168.1.1 with 32 bytes of data:

    Request timed out.
    Request timed out.
    Request timed out.
    Request timed out.

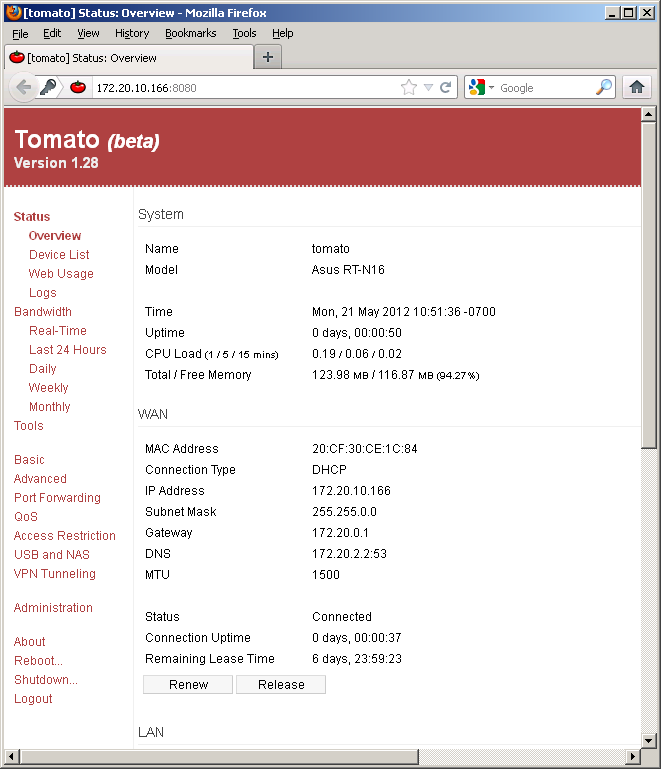
    After waiting, reboot the router by unplugging it from power and then plugging it back in again. After a moment you should be able to connect to the router using a web browser at http://192.168.1.1. The default username and password are “admin” (for both username and password).

    EDIT: Some builds of DD-WRT have USB support (enabled under “Services”). Ultimately I ended up running dd-wrt.v24-18777_NEWD-2_K2.6_mega.bin, which was easy to flash to as an “Upgrade” within TomatoUSB’s web GUI.

  • De-ActiveX-ifying an ActiveX Component

    Some ActiveX components add “enhancement” to the browser by dropping in custom controls for forms or other fanciness. Those types of components require the browser, because they augment the user’s experience within the browser. Other ActiveX components are little more than a standalone executable that can get it’s command line arguments from the web page that serves it. This article is about my experience separating out such an executable from it’s ActiveX constructs and using it without Internet Explorer.

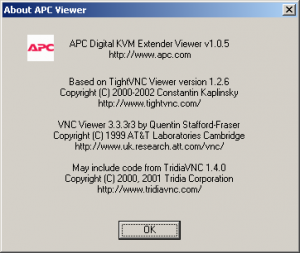
    I have an old APC AP5456 IP Gateway for Analog KVM, it’s a neat little device other than it’s insistence that I use Internet Explorer. It uses an ActiveX component to view the remote consoles. It’s based on VNC, and has some encryption of the RFB data added in. The device listens on port 80 (http) and 5900 (VNC). If I had any doubt after seeing the port number, it was cleared up in the “About…” dialog.

    Unfortunately, I couldn’t just use a regular VNC client to connect. The authentication process has been removed from the VNC-side of things and moved to the web page. When you authenticate to the web page of the IP KVM, it gives the ActiveX component an authentication token which is used to view the console of the computer it’s connected to.

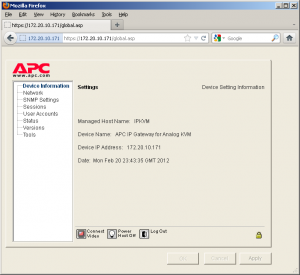
    When you first login using a web browser you’re shown several options. The one we’re interested in is “Connect Video”

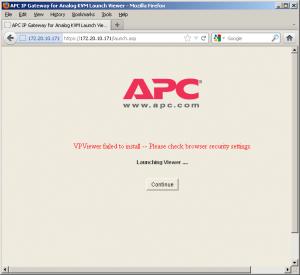
    After clicking “Connect Video” we’re taken to another screen where the ActiveX component should normally be launched. I’m using Firefox in this screenshot so it fails. Most browsers other than Internet Explorer have no idea what to do with ActiveX (and rightfully so).

    This page will meta refresh back to the previous page, so quickly select the option to view the source (Control+u in Firefox).

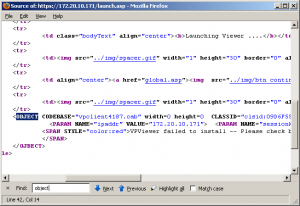
    I searched the page for the <OBJECT> tag that normally holds the ActiveX details. Here is the relevant portion.

    <OBJECT CODEBASE="vpclient4187.cab" width=0 height=0  CLASSID="clsid:09D6F55E-F235-4187-9C60-1D09CFD9FAFF">
      <PARAM NAME="ipaddr" VALUE="172.20.10.171">
      <PARAM NAME="sessionkey" VALUE="0688565E0688565EFA72032A87995D28" >
      <PARAM NAME="encryptionkey" VALUE="68F0585E68F0585E6BBA4AE3E6EF95FA">
    </OJBECT>

    The first thing to notice is the vpclient4187.cab cabinet file. Unpacking the cab file gives us AvocentHTTP.dll, vpfilexfer.dll, launchEXE.dll, vpclient.inf, vpclient.exe, and vpclient.dll. Awesome! It’s probably just that vpclient.exe I need to run right?
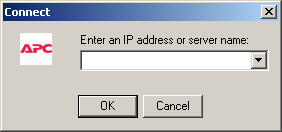
    Well, no, unfortunately typing in the IP address of our IP KVM appliance into the dialog doesn’t result in a connection. We need that authentication token and encryption key to be included in the picture. It still seems very likely that vpclient.exe is what we want, but there’s more configuration that it clearly needs. Since there are no other settings in the dialog of vpclient.exe to adjust, we’ll optimistic assume those missing requirements are passed to it by the command line. The information could be passed to it by Windows messages, after all it’s not the first thing that gets called from the web browser. Looking at the contents of the INF file shows that launchEXE.dll matches the CLASSID of our object codebase. That dll probably gets all the details and hands it off to vpclient.exe. Before we freak out, lets try to keep it simple.

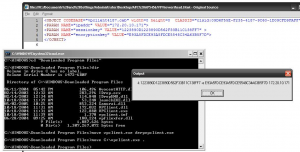
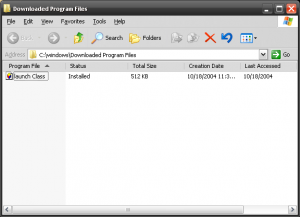
    I wrote a little program to display a message box with the contents of any command line arguments it receives. From a Windows XP computer with Internet Explorer I connect to the IP KVM as normal, and then close the KVM application and Internet Explorer. This causes the ActiveX object to get downloaded and cached. Cached in %WINDIR%\Downloaded Program Files to be specific. I replaced the vpclient.exe with my own application (keeping the name the same). You will need to do this from the command line however, as Windows treats the %WINDIR%\Downloaded Program Files directory in a special way, which blocks you from seeing the actual files contained in it.

    When I reopen Internet Explorer and attempt to connect with the IP KVM again, I see that my speculation was correct.

    The Session Key and the Encryption Key change frequently, and require the vpclient.exe connection to come from the same IP address that authenticated to the web browser, but if we act quickly we can start a session using the information available in view source as command line arguments to vpclient.exe.

    C:\Documents and Settings\Administrator\Desktop>vpclient.exe -k [Session Key] -e [Encryption Key]  [IP Address]

    Of course the reasonable thing to do at this point is to make a front-end client to connect to the IP KVM web page, parse out the required content, and launch vpclient.exe with our argument. I’ll leave that up to you, but if you’re interested in doing it under Linux I’ve got you covered.