Author: admin

  • Symantec Endpoint Recovery Tool (SERT) Pin Number (All of Them)

    Symantec Endpoint Recovery Tool (SERT) Pin Number (All of Them)

    The Symantec Endpoint Recovery Tool (SERT) is a great concept, it puts the power of Symantec’s Endpoint Protection antivirus scanning onto a bootable CD. If you are familiar with rootkits, you can probably see where this is useful. To scan a file for viruses an antivirus scanner makes a request to the operating system for the contents of the file. Sophisticated forms of malicious software (malware) can intercept this request. Instead of the system returning the contents of the virus to the scanner, benign data is returned instead and thus detection by the antivirus software is avoided. A rootkit can only be effective at intercepting requests while it is running in the system. By booting from a “Live CD” a rootkit-free operating system can be used to perform the antivirus inspection. A similar idea utilizing the open source ClamAV antivirus scanner can be found in the OpenDiagnostics Live CD. EDIT: Readers might also find the AVG Rescue CD of interest.

    Now that I’ve said some nice things about Symantec, let us get to the crux of this article.

    “The expiry is by design.”

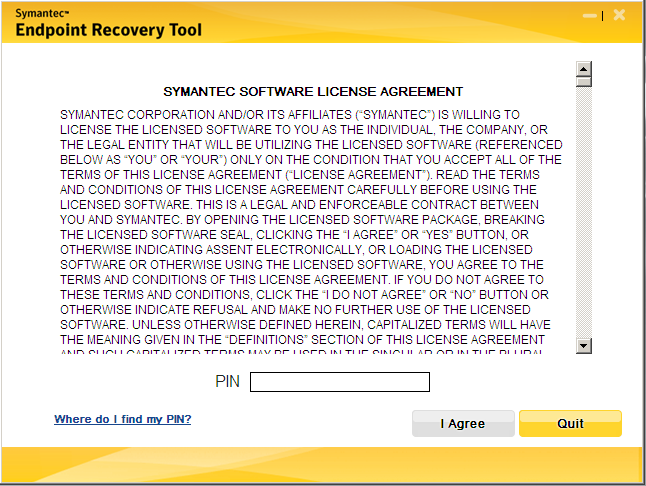
    The Symantec Endpoint Recovery Tool has developed a nasty trait of asking for a “PIN” before it will begin a scan.

    According to Symantec this issue occurs whenever the SERT software is used post-April 30th, 2012. Instead of acknowledging this as a bug, Symantec asserts this annoyance is “by design”.

    http://www.symantec.com/business/support/index?page=content&id=TECH159200
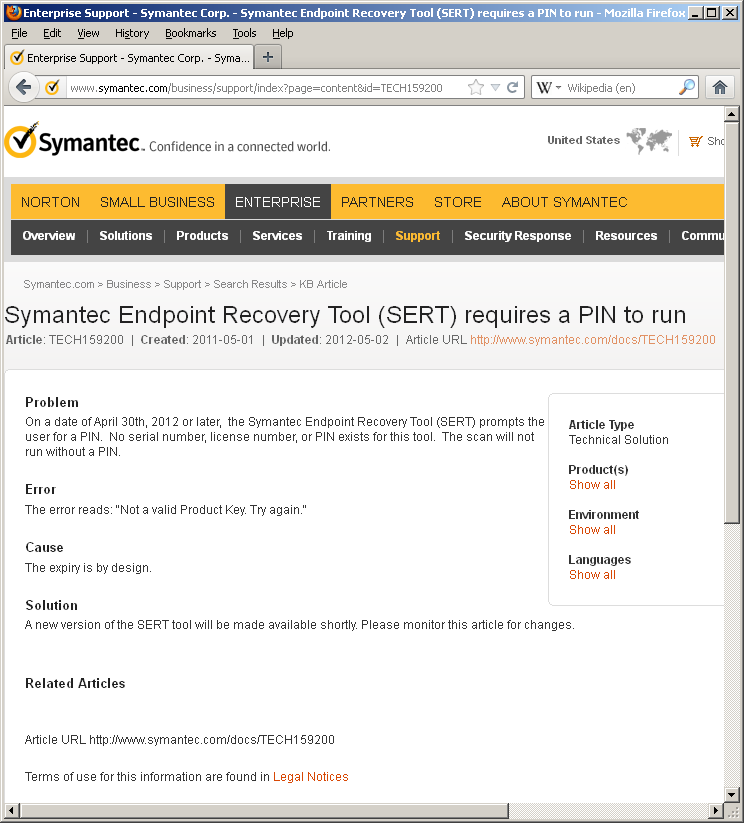
    I have a hard time believing this claim. There is no reason given as to why this “feature” would possibly be intentional. According to the KB article, “No serial number, license number, or PIN exists for this tool”. If the intent was simply to expire the software I would have expected an error to that effect not a prompt for an imaginary pin number. Why ask for something that should “by design” never exist? If the expiry date was built-in because of licensing issues, or to get people to upgrade for some other reason shouldn’t there be a replacement release of this software ready to go prior to the April deadline? This might make a little bit of sense if the idea was to kill off SERT unceremoniously, but the KB goes on to say “A new version of the SERT tool will be made available shortly”.

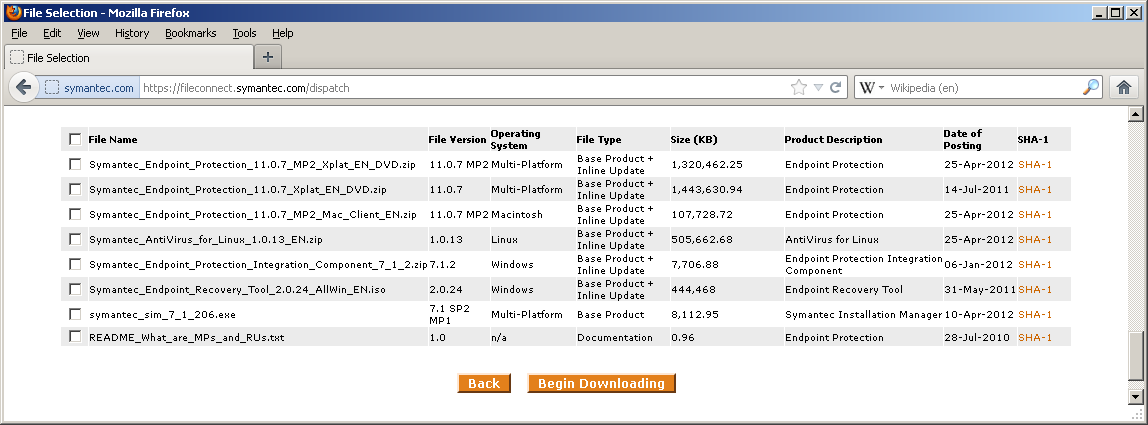
    A quick check of File Connect did not show me any suitable replacement candidate

    The latest SERT ISO available to me continues to be the (apparently) deprecated Symantec_Endpoint_Recovery_Tool_2.0.24_AllWin_EN.iso with the SHA-1 sum matching my existing copy (ded1b82350ecfe315896630feb04938aa48e22ee).

    Bug or not, someone goofed up. The alternative is that Symantec knew the software would quit working, chose to do nothing about it, and decided to be needlessly vague about the details.

    Continued use

    There are two ways to continue using the software, neither of which seem to be documented in the KB.

    The first method is the most obvious. If the software quits working after April 30th 2012, just set an earlier date on the system.

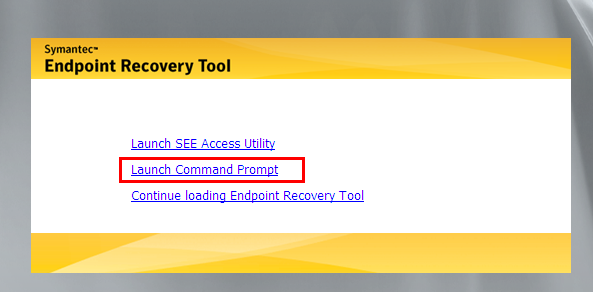
    During the normal flow of using SERT you are given an option to “Launch Command Prompt” before going into Endpoint Recovery Tool proper.

    Click “Launch Command Prompt”

    At the command prompt type “date 4-29-2012” and hit enter. Then type “exit” and hit enter.
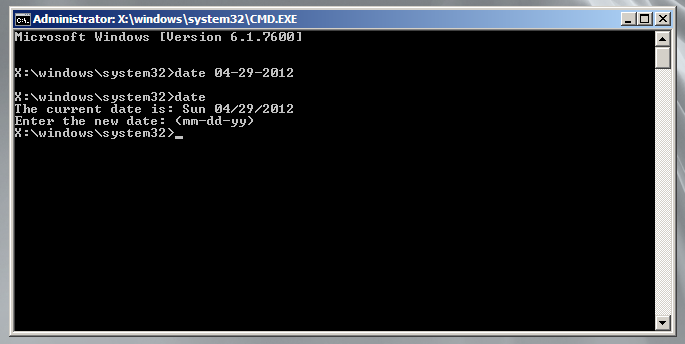
    You should be back at the menu, choose “Continue loading Endpoint Recovery Tool”.
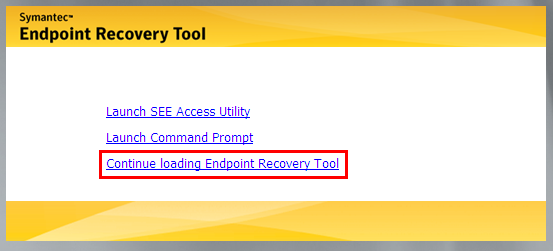
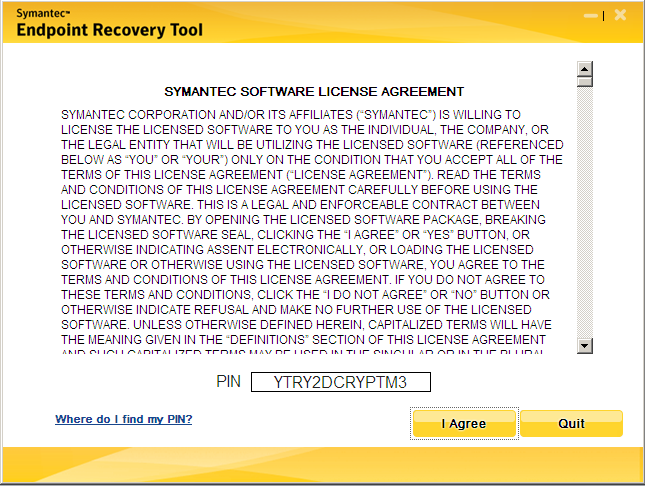
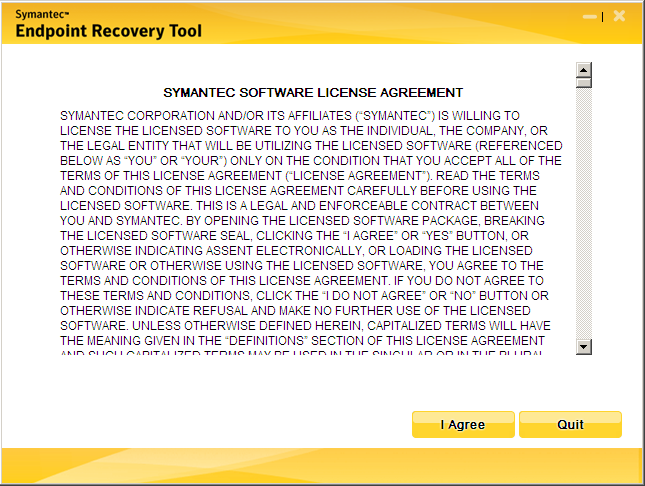
    You should now see the License Agreement as you normally would have seen it pre-April 30th, 2012.
    Method 2

    If by “No serial number, license number, or PIN exists for this tool” Symantec actually meant “No single serial number […]”, they would be correct, there are in fact very many of them. Continuing to make the “by design” argument more perplexing, the PIN code that should not exist does in fact exist, and is extremely easy to guess. I can’t help, but wonder what possible purpose this “design” had in mind.

    I started out spamming “1”‘s into the PIN field, which didn’t work, then moved on to “2”, which did work. I started making a list of the codes that worked for me.

    2222222222222
    3333333333333
    4444444444444
    6666666666666
    7777777777777
    8888888888888
    9999999999999

    Then I started playing with some variations. It didn’t take long before I realized what was going on.

    2222222222223
    3222222222222
    2346789234678

    Next, I started looking for characters other than numbers

    222222222222B
    222222222222C
    222222222222D
    222222222222F
    222222222222G
    222222222222H
    222222222222J
    222222222222K
    222222222222M
    222222222222P
    222222222222Q
    222222222222R
    222222222222T
    222222222222V
    222222222222W
    222222222222X
    222222222222Y

    So in the end, the PIN code is any combination of 13 of the following 24 alphanumeric characters
    {2, 3, 4, 6, 7, 8, 9, B, C, D, F, G, H, J, K, M, P, Q, R, T, V, W, X, Y}

    Interesting “design” Symantec.

  • Replace Battery in Plantronics CS70 Headset

    Replace Battery in Plantronics CS70 Headset

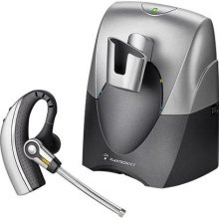
    I’m not sure what electronics manufacturers are thinking by making devices with batteries soldered into circuit. I guess they are thinking “this is a rechargeable battery”, but eventually those batteries quit recharging. This is a problem that users of older generation iPods and iPhones are probably becoming very aware of.

    Anyhow, since I like keeping things out of the landfill when I can, I have a soldering iron handy. I’m using a 3.7 VDC Li-Ion 120 mAh battery marketed for this purpose. I think I paid about $5 for it. There are more expensive versions of the same replacement online, and given the proclivity of cheap lithium batteries to burst into flame and the proximity of this device to human heads it might not be a bad idea to spring for the more expensive variety. I’m not sure if more money means more safety, and it’s not my head in danger, so I went with the cheapest battery I could find. I would have thought being a $200 headset system and all that Plantronics would have an official battery to buy as a replacement, but I wasn’t able to find one.

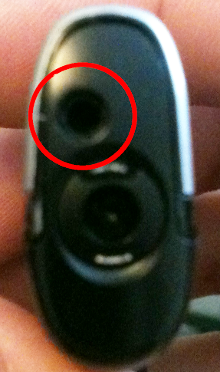
    Start with removing the one screw at the base of the ear piece. The silver shell should separate from the black portion that sits on the ear.

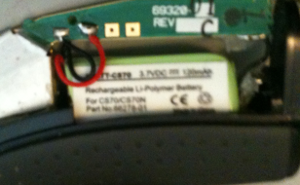
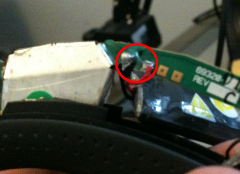
    Here are the two solder joints connecting the battery to the printed circuit board. There was also a bit of glue that I pealed off at this point before soldering.

    Carefully work the battery out of it’s comfortable little nook without bending the PCB too severely.

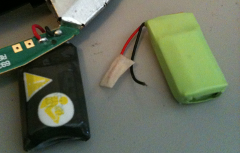
    Here is the new battery (green) next to the old (still connected) battery. Notice how the new battery has a bit of tape covering the red (postive) wire. This is probably a good idea as it prevents the two wires from potentially shorting and causing a fire. You should probably throw a bit of tape on the end of the red wire on your old battery (once removed) for safer storage before you can get around to recycling it. Incidentally, Batteries Plus has many locations across the United States and they’ll take your old junk batteries without a fee.

    After the new battery is soldered on, carefully tuck it back into place and then reassemble the headset.

    ..And that’s it. You can be done with the whole process in under 5 minutes if your soldering iron heats up fast enough.

  • Reset Buffalo TeraStation PRO Model TS-RHTGL/R5 Password

    Reset Buffalo TeraStation PRO Model TS-RHTGL/R5 Password

    Have a Buffalo TeraStation PRO Model TS-RHTGL/R5 and lost your password? Me too, here’s how I reset the web interface login without losing all my data. The steps will probably be similar on other TeraStation models, but I think the default user credentials might be different (username ‘Administrator’ vs. ‘admin’, etc). The TeraStation this was tested on is a TS-RHTGL/R5 running firmware version 1.30. Make a note of your device’s existing IP address. After I reset mine it switched to DHCP configuration. This isn’t a big deal (provided you have a DHCP server) as the new IP address is easily found through the LCD status window on the TeraStation. Luckily the majority (all?) other configuration details: NTP, SMTP, email address, Active Directory settings, etc appear to have been preserved. Before following these instructions you might want to start with trying the default login credentials:

    Username: admin
    Password: password

    Remove the Bezel

    In order to reset the password you’ll need to remove the front bezel. If you are lucky enough to know where your key is or had the foresight to leave your TeraStation unlocked you can skip ahead.

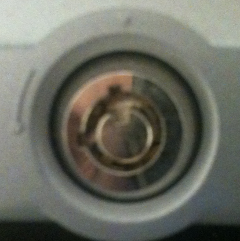
    As expected the tubular lock (Also called Chicago or Ace lock) that keeps the face secured to the TeraStation is a cheap one. It has a smaller diameter than common tubular locks and only appears to have 4 pins vs. the more typical 7 or 8 pin varieties. After trying destroying several disposable pens I was able to find one that would work as a make-shift pick for this purpose. Instead of using the exterior shaft of the pen like the infamous Kryptonite bike lock exploit, the smaller diameter of this lock requires a smaller diameter bit of soft plastic. You might be thinking:

    “Locks aren’t designed to have all the pins pushed to maximum depths in order to be unlocked, they require specific depths for each pin position and hence a specific key”.

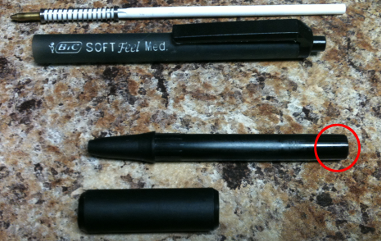
    Normally you would be correct, but as I said, this is a very cheap lock. After trying several disposable pens I ended up using a “BiC SOFT Feel Med.” which worked great. Disassemble the pen and remove the ink cartridge and comfort grip from the business-end of the pen. The backside of the piece we are interested in (circled in red below) is a good fit for the diameter of the lock. I was able to lock and unlock the TeraStation several times with this bit of plastic with little effort.

    Reset the Password

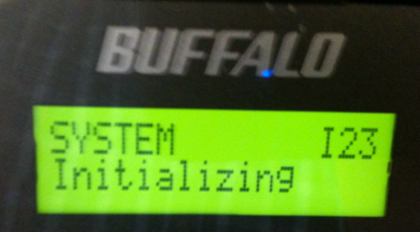
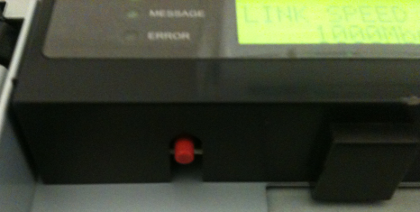
    Now that the bezel is off, look at underside of the display panel on the left-hand side. Press and hold the red button until the display reads “SYSTEM Initializing”. The TeraStation will start beeping, the beeps will continue for 30 or 40 seconds.

  • Installing Tomato USB on Asus Routers (RT-N16 etc) in Windows

    Installing Tomato USB on Asus Routers (RT-N16 etc) in Windows

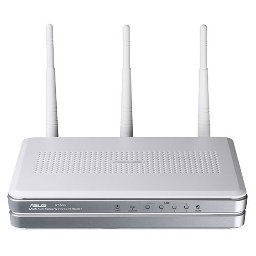
    Why Tomato USB? For USB support. What is Tomato USB? It’s a USB enabled version of Tomato. It’s similar to DD-WRT. a third-party firmware for your router to give you advanced features not normally found in a consumer router (VPN, captive portal, etc). Why from Windows? There is already a good write-up on doing it from Linux. The ASUS RT-N16 is a pretty good little router, but for $75 USD you’d hope it would be. According to Wikipedia the RT-N16 sports a Broadcom BCM4718 SoC running at up to 533MHz with 128MB of RAM and 32MB of flash memory.

    WARNING: Following these instructions may result in turning a perfectly good router into a useless brick. If you chose to continue, you do so at your own risk.

    Start by downloading a copy of Tomato USB. Since the RT-N16 has a (relatively) big 32MB of flash you might as well go for the gusto and get the “VPN” version which is the “Ext” version with VPN support added. the “Ext” means “Extras”, so either Ext or VPN will give you plenty of bells and whistles.

    Download Tomato USB here, I chose the “VPN” version under the heading “Kernel 2.6 (experimental) for MIPSR2 Routers”

    http://tomatousb.org/download

    Specifically I downloaded tomato-K26USB-1.28.9054MIPSR2-beta-vpn3.6.rar, but you’ll probably want whatever is most recent. You’ll also need a program to unRAR the archive, 7-zip is a fine choice.

    Once unpacked you should have a file with the extension “.trx”, in my case my file is named “tomato-K26USB-1.28.9054MIPSR2-beta-vpn3.6.trx

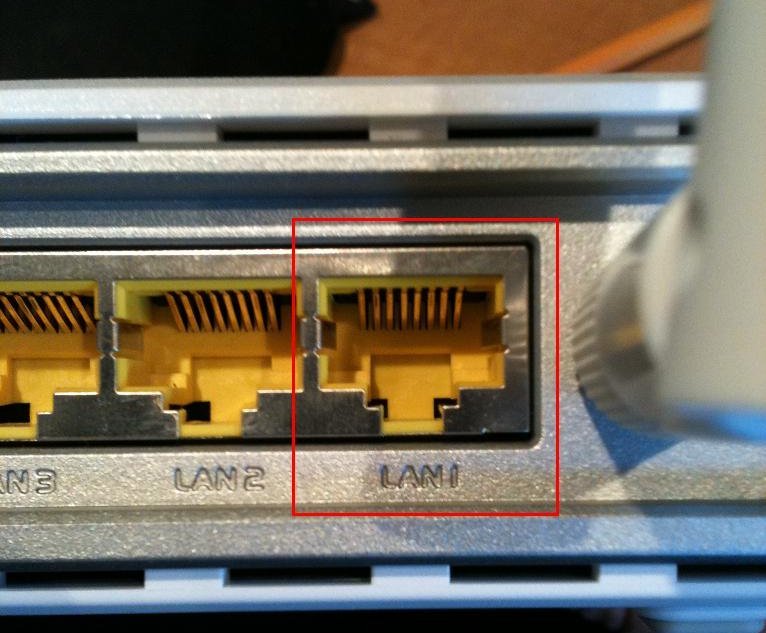
    Once you’ve downloaded the file, plug your computer into the LAN1 port on the RT-N16.

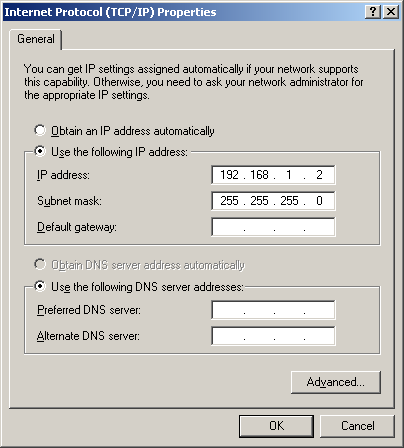
    Change your Windows settings to (or add) an IP in the 192.168.1.0/24 subnet.

    In Windows XP, click “Start“, then go to “Settings” and chose “Control Panel

    Find the network icon, if you can’t see it you may have to switch into “Classic view” from the options in the left-hand side margin. Windows Vista, and 7 have the ability to set settings similarly, but the menus are buried in other locations.

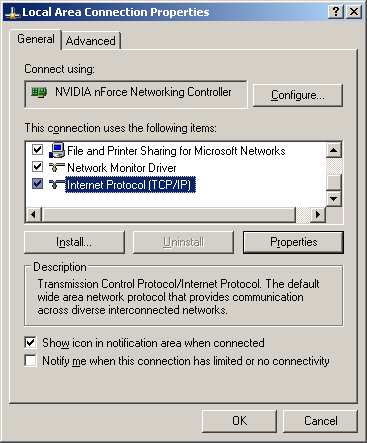
    Find your Local Area Connection, right click and choose Properties. Then scroll down to “Internet Protocol (TCP/IP)” and click “Properties

    Now put the RT-N16 into recovery mode, to do this press and hold the “Restore” button on the back of the router while you plug the router into a power outlet.

    The “Power” light should be flashing if you did it right, if not try again.

    Open a command prompt, click the Windows “Start” button again and go to “Run” (or hit the windows key on your keyboard and ‘R’ at the same time). At the “Open” prompt type “cmd.exe” and click “OK“.

    Test to see if you can ping the router in recovery mode, you should see “Reply from…” not “Request timed out“.

    C:\Users\chris\>ping 192.168.1.1

    Pinging 192.168.1.1 with 32 bytes of data:

    Reply from 192.168.1.1: bytes=32 time=11ms TTL=64
    Reply from 192.168.1.1: bytes=32 time<1ms TTL=64
    Reply from 192.168.1.1: bytes=32 time=1ms TTL=64
    Reply from 192.168.1.1: bytes=32 time=1ms TTL=64

    Ping statistics for 192.168.1.1:
        Packets: Sent = 4, Received = 4, Lost = 0 (0% loss),
    Approximate round trip times in milli-seconds:
        Minimum = 0ms, Maximum = 11ms, Average = 3ms

    Move to the location where you extracted the “.trx” file from the RAR archive. If this is your Desktop then “cd Desktop” might do it.

    C:\Users\chris\>cd Desktop
    C:\Users\chris\Desktop\>

    Flash the router with the new firmware using the tftp client built into Windows.

    C:\Users\chris\Desktop\>tftp -i 192.168.1.1 PUT tomato-K26USB-1.28.9054MIPSR2-beta-vpn3.6.trx
    Transfer successful: 6602752 bytes in 14 seconds, 471625 bytes/s

    It’s very important that you include the “-i” after “tftp”, this switches the transfer into binary mode, it will mung your transfer otherwise and potentially brick your router.

    Wait a minute after the transfer has completed to let the router apply the firmware. If everything worked right, the router should no longer be responding to ping requests

    C:\Users\chris\>ping 192.168.1.1

    Pinging 192.168.1.1 with 32 bytes of data:

    Request timed out.
    Request timed out.
    Request timed out.
    Request timed out.

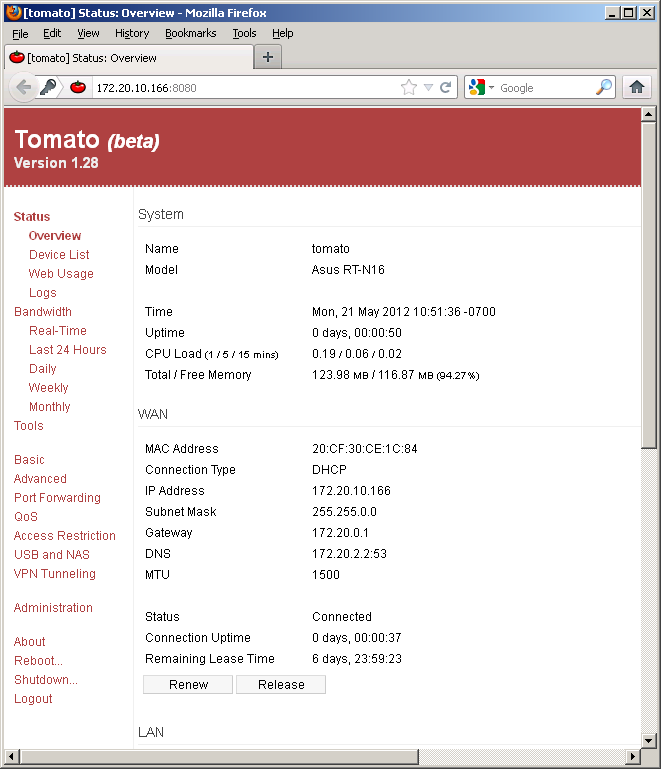
    After waiting, reboot the router by unplugging it from power and then plugging it back in again. After a moment you should be able to connect to the router using a web browser at http://192.168.1.1. The default username and password are “admin” (for both username and password).

    EDIT: Some builds of DD-WRT have USB support (enabled under “Services”). Ultimately I ended up running dd-wrt.v24-18777_NEWD-2_K2.6_mega.bin, which was easy to flash to as an “Upgrade” within TomatoUSB’s web GUI.