Category: System Administration

Keeping the machine moving

  • Unattended ACPI Shutdown of Windows VMs

    As part of a backup script I have some VirtualBox machines shutdown gracefully using the VBoxManage command:

    VBoxManage controlvm "$VM_NAME" acpipowerbutton

    This command emulates pressing (not holding) the power button on a modern computer. A compliant operating system should see the event and trigger a shutdown or other response.

    For ACPI shutdown events to work properly with Windows VMs that share resources to remote users, changes must be made to allow shutting down when a user is not logged in locally to the computer. Two methods can be used to enable the feature, both of which are discussed below. You may need to reboot your guest OS after making the changes before they will work.

    Method 1: Group Policy Editor

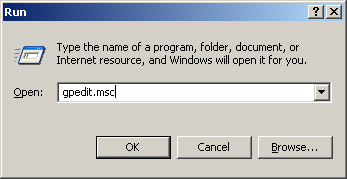
    Open the Run dialog (Windows key + r), type in “gpedit.msc” and click “OK” to open the Group Policy Editor.

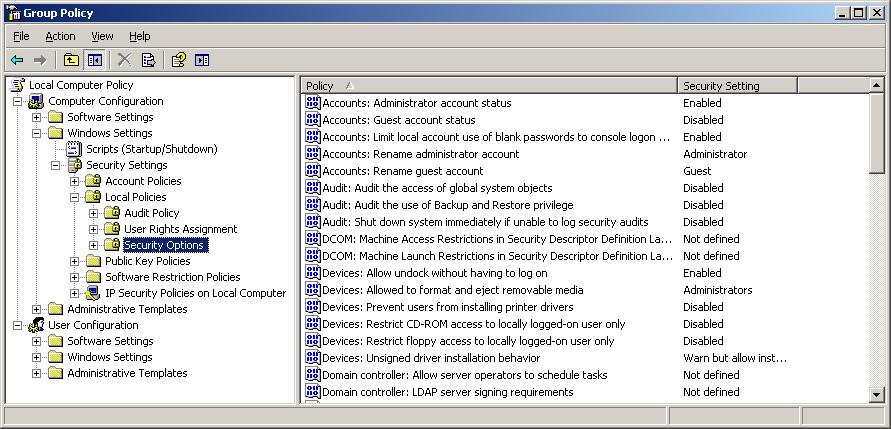
    Once in the Group Policy Editor expand “Computer Configuration“, then “Windows Settings“, then “Security Settings“, then “Local Policies” and click on “Security Options” as shown below

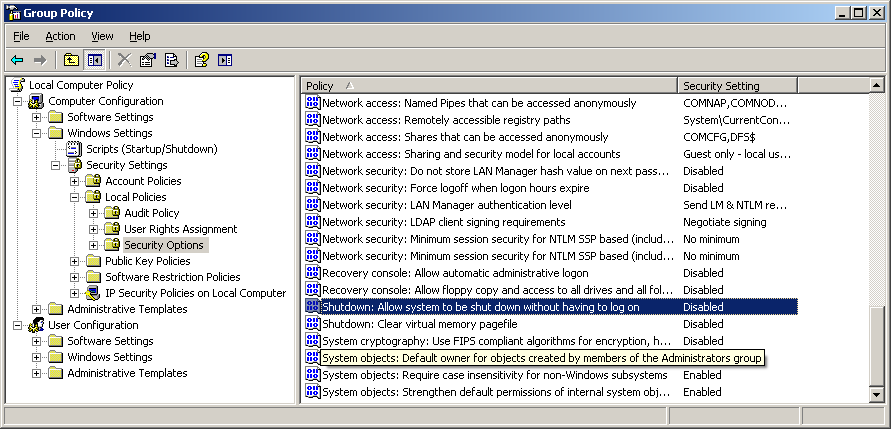
    Scroll down the list in the right pane and find “Shutdown: Allow system to be shut down without having to log on“. In server versions of Windows this option will be “Disabled” by default.

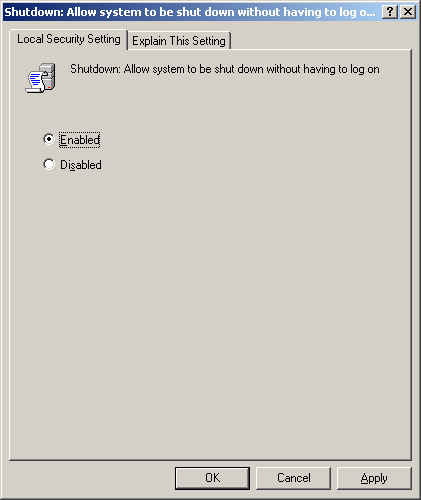
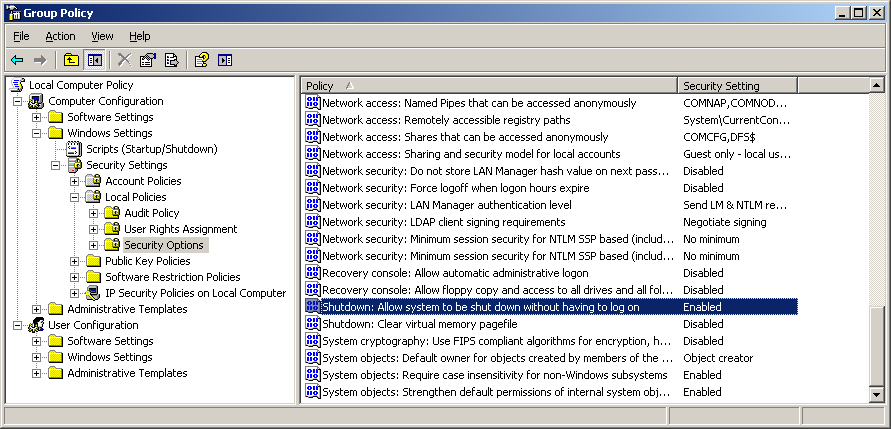
    Double click on “Shutdown: Allow system to be shut down without having to log on” and select “Enabled“. Click Apply and OK to save the changes.

    That’s it, this feature is now enabled.

    Method 2: Registry Editor

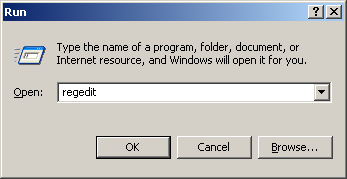
    Open the Run dialog (Windows key + r), type in “regedit” and click “OK” to open the Registry Editor.

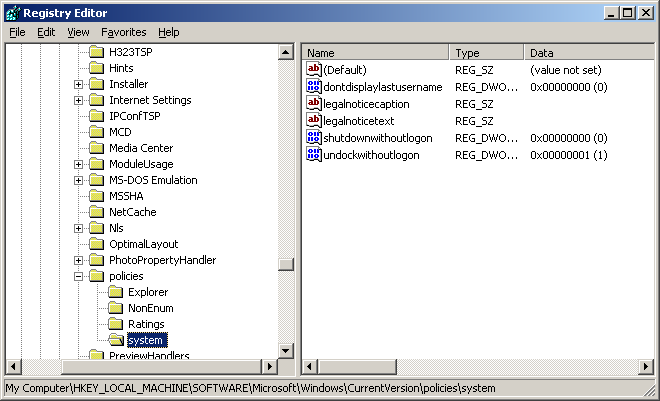
    In the left window pane expand “My Computer” to find “HKEY_LOCAL_MACHINE“, then “SOFTWARE“, then “Microsoft” then “Windows“, then “CurrentVersion“, then “policies“, then “system” as shown below

    HKEY_LOCAL_MACHINE\SOFTWARE\Microsoft\Windows\CurrentVersion\policies\system

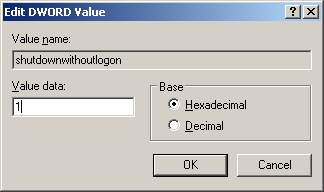
    In the right pane double click on “shutdownwithoutlogon” and change the value to “1“. Since the value is less than 10 is doesn’t matter if Hexadecimal or Decimal is selected. Click “OK” to save.

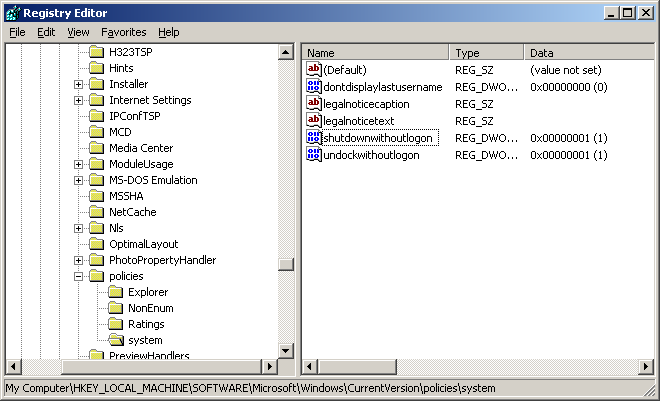
    The value next to “shutdownwithoutlogon” should now show the value of “0x00000001 (1)” as shown below.

    Power button in Power Options

    Make sure that the power button is configured correctly in “Power Options“. Open the Control Panel and double click on the “Power Options” icon.

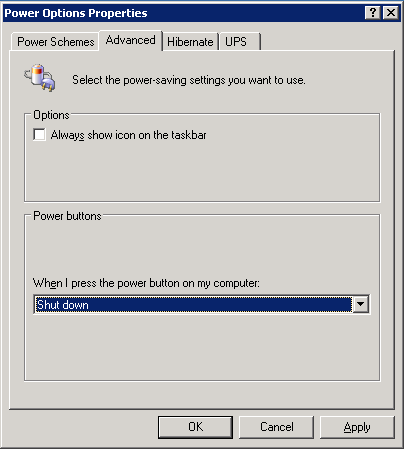
    Click on the “Advanced” tab. In the “Power buttons” section the value under “When I press the power button on my computer:” should be set to “Shut down” as shown below.

    Disable Shutdown Warning

    Windows warns you when you are about to shutdown and take away resources from that appear to be in use. On a server there is a pretty good chance that resources will be in use when it comes time to shutdown. The confirmation dialog box is not conducive to scripting because manual intervention is required.

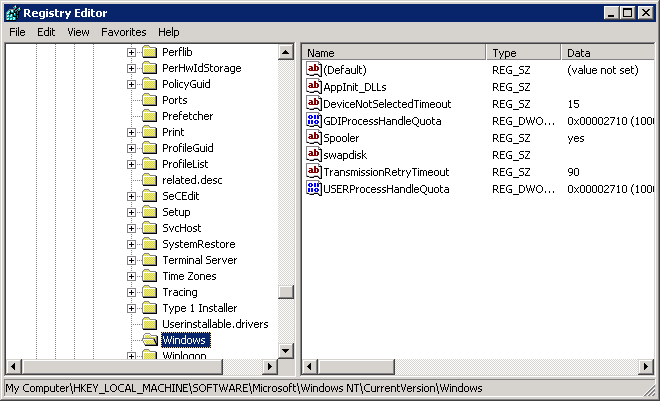
    Although this warning message can’t be removed completely it can be configured to wait only momentarily before automatically selecting the affirmative option and proceeding with the shutdown. To set a timeout, open the Registry Editor (as described earlier) and navigate to

    HKEY_LOCAL_MACHINE\SOFTWARE\Microsoft\Windows NT\CurrentVersion\Windows

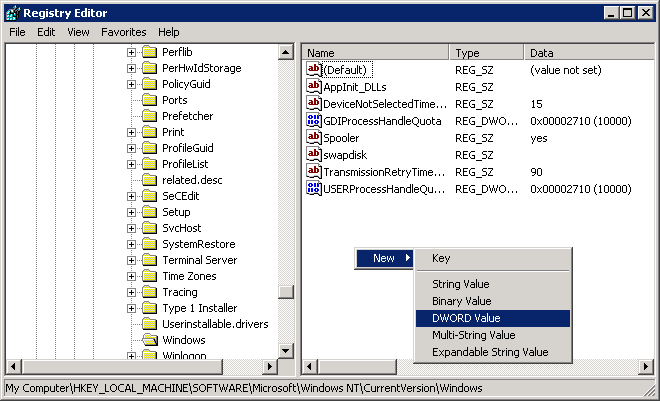
    Right click in the free space in the right-hand window pane and choose “New” then choose “DWORD Value

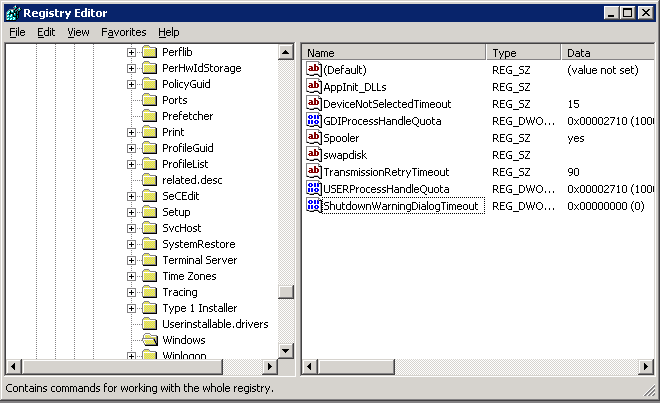
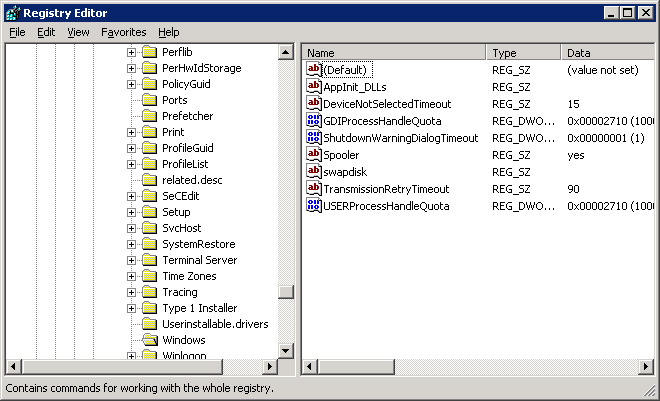
    Replace “New Value #1” with ShutdownWarningDialogTimeout. It should look like below if you’ve done it correctly.

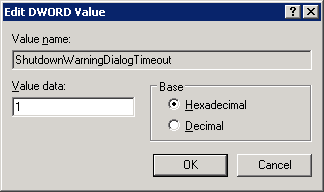
    Now double click on “ShutdownWarningDialogTimeout” to change it’s value. This value is the amount of time to display the warning message before continuing with the shutdown. I’ve set the value to “1“, but it might be wise to set it high enough so that if an actual person was orchestrating the shutdown the notice could serve it’s purpose and alert the operator that they might want to re-think their plan.

    If everything worked it should look similar to the image below

    For your convenience

    Although these steps are pretty quick to implement, they can be annoying to implement on each of your virtualized servers. For your convenience I’ve included a a registry file which can be merged into your existing hive to implement the settings to allow both shutdown while logged off and automatic dismissal of the shutdown warning notice of connected users.

    ACPI_Friendly_Shutdown.reg

    To add the settings to the registry double click the registry file. Windows will prompt you to confirm you wish to merge the changes.

    If everything imported OK, Windows will let you know

    If that doesn’t work…

    There may be cases where the above changes are not enough. It is possible to configure Windows to select the default answer from a MessageBox dialog without displaying it. You should use this option as a last result as it may will have unintended consiquences. For more information see the Microsoft article at:
    http://msdn.microsoft.com/en-us/library/ms940850%28v=winembedded.5%29.aspx

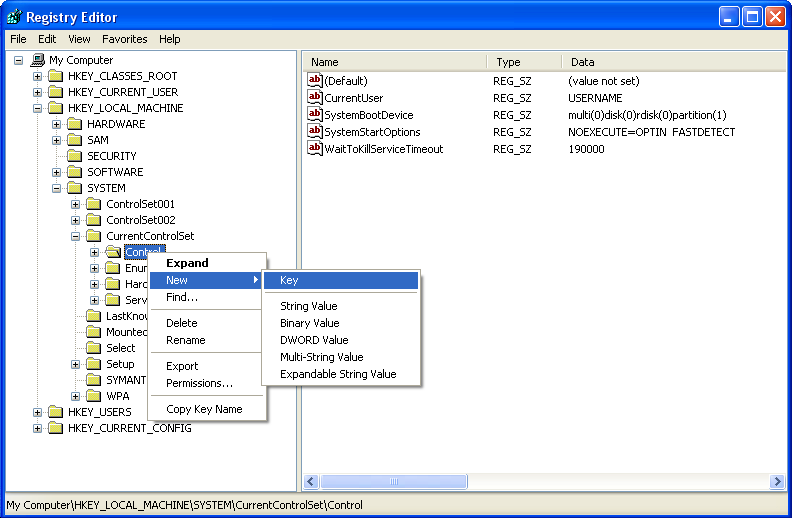
    To enable this feature, open the registry editor (as described previously) and navigate to:

    HKEY_LOCAL_MACHINE\SYSTEM\CurrenctControlSet\Control

    Right-click on “Control” and choose “New” followed by “Key

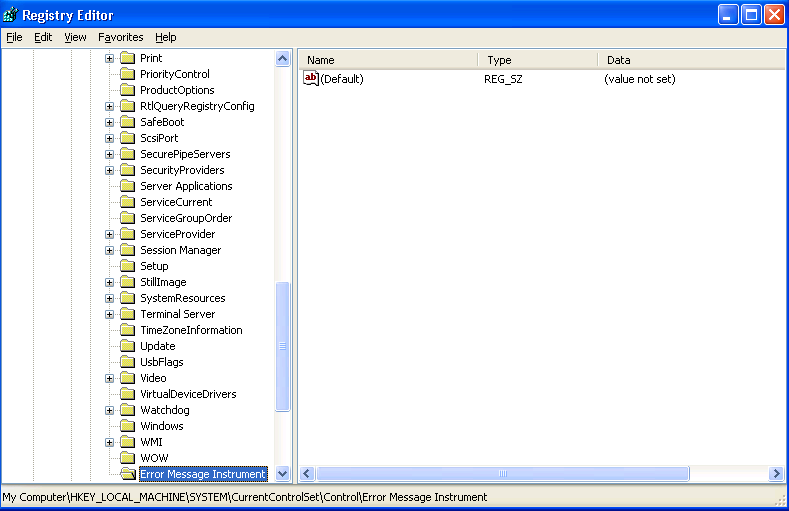
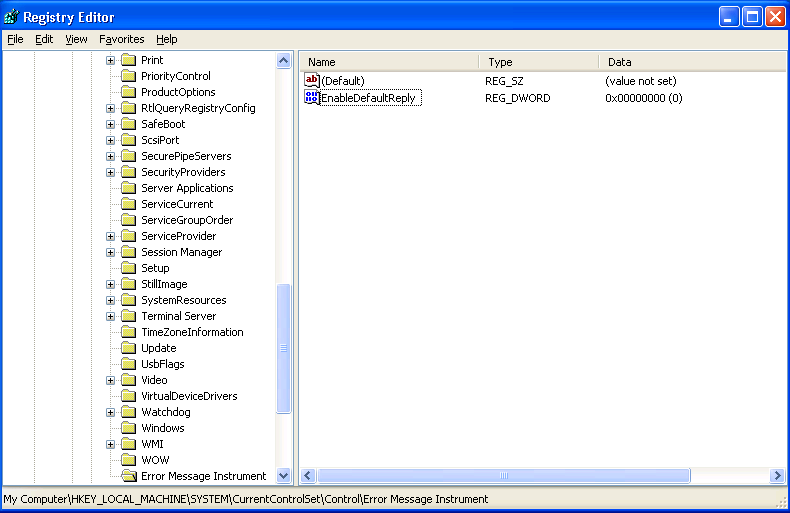
    The words “New Key #1” will be highlighted, begin typing to overwrite the default value with “Error Message Instrument

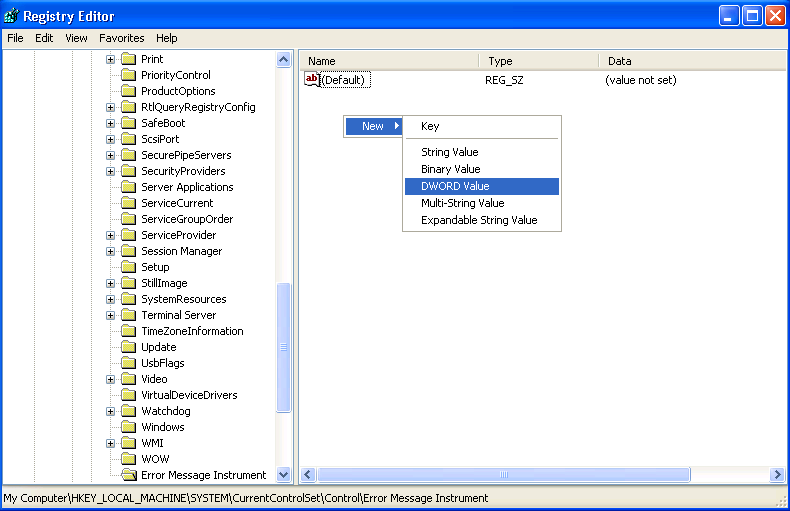
    In the empty space on the right-side pane, right-click and choose “New“, followed by “DWORD Value

    Set the name to “EnableDefaultReply”

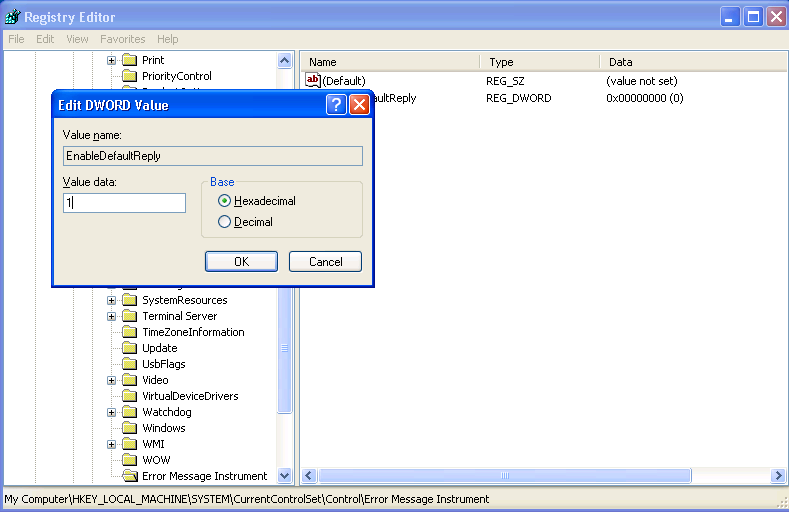
    Double-click on “EnableDefaultReply” to set the value. Type the value “1” into the “Value data” field and click “OK

  • Zombie Process: Killing the Undead

    Is your Ubuntu MOTD warning you of a zombie process?

    Welcome to Ubuntu 11.10 (GNU/Linux 3.0.0-20-server x86_64)

    * Documentation: https://help.ubuntu.com/11.10/serverguide/C

    System information as of Thu Jun 28 18:36:57 EDT 2012

    System load: 0.0 Processes: 94
    Usage of /: 68.2% of 1.79TB Users logged in: 1
    Memory usage: 29% IP address for eth0: 10.0.0.10
    Swap usage: 8%

    => There is 1 zombie process.

    What’s the scoop with that last line “There is 1 zombie process“, is my operating system getting caught up in this current climate of zombie infatuation? Well no, sadly it’s more boring than that. A zombie process occurs when a child process ends, but the parent doesn’t “reap” it. For a much better run down on what a zombie process is check out the Wikipedia article: Zombie process.

    Here is a quick run down on some terminology. A process is just a fancy name for a running instance of a program. A child process (or just “child”) is a process started by another process. A process that starts another process is the “parent process” of the process it starts.

    The ‘ps’ command shows processes we are running.

    user@host:~$ ps
    PID TTY TIME CMD
    5828 pts/4 00:00:00 bash
    6122 pts/4 00:00:00 ps

    The ‘pstree’ command can show a family tree (of sorts) for processes, parents, their children, the children of their children, etc. Our shell is bash, and as we can see in the output from ‘ps’ above, the process ID number (pid) of our bash prompt is 5828.

    user@host:~$ pstree -Gpl 5828
    bash(5828)───pstree(6123)

    Here we can see that bash is the parent process of the pstree command itself when we run it from the bash prompt. The pstree command exits shortly after it displays this information, and bash will go back to being childless. If we run another instance of bash from inside of the current bash prompt, the new bash instance will be a child of the first.

    user@host:~$ bash
    user@host:~$ pstree -Gpl 5828
    bash(5828)───bash(6124)───pstree(6389)

    So you can see our original bash process with the pid number 5828 has begotten our new child bash process of 6124. The new bash process is where we are running the ‘pstree’ command from, so pstree is a child of 6124.

    For an interesting look at your systems family tree, try running ‘pstree -Gpl 1‘.

    Hopefully you have a good handle on the whole parent/child thing. Now we’ll go zombie hunting. The system has told us that there is a zombie, but we know nothing about it. The ps command has options that will print the status of a process in a column of its output.

    root@host:~# ps aux |grep Z
    USER       PID %CPU %MEM    VSZ   RSS TTY      STAT START   TIME COMMAND
    root      2925  0.0  0.0   9256   880 pts/2    S+   18:40   0:00 grep Z
    root     28766  0.0  0.0      0     0     ?    Z    Jun06   0:00 [apt] <defunct

    Here we’ve used the ‘grep’ command to search for a pattern “Z”. Because there is a “Z” in the “VSZ” column header we can also see the ‘ps’ header we were talking about. Over in the “STAT” column we can see that something called “[apt]” has the mark of the zombie (Z).

    At this point you might be thinking about using the ‘kill’ command to kill this zombie dead. The problem with killing a zombie is that by definition they are already dead. Unlike motion pictures, the way to kill a Linux zombie isn’t by shooting it in its head, but by killing its parent (maybe we should call them vampires instead?).

    Kill and kill -9 are futile at killing zombies.

    root@host:~# kill 28766
    root@host:~# ps aux |grep Z
    USER       PID %CPU %MEM    VSZ   RSS TTY      STAT START   TIME COMMAND
    root      2925  0.0  0.0   9256   880 pts/2    S+   18:40   0:00 grep Z
    root     28766  0.0  0.0      0     0     ?    Z    Jun06   0:00 [apt] <defunct
    root@host:~# kill -9 28766
    root@host:~# ps aux |grep Z
    USER       PID %CPU %MEM    VSZ   RSS TTY      STAT START   TIME COMMAND
    root      2925  0.0  0.0   9256   880 pts/2    S+   18:40   0:00 grep Z
    root     28766  0.0  0.0      0     0     ?    Z    Jun06   0:00 [apt] <defunct

    So what gives? The ‘kill’ command is for killing processes, so what good is it if we can’t kill these processes? Zombie processes have ended, they are no more. Ghosts might be a more fitting term, traces of them exist in the system, but they are no longer functioning, they are waiting to gasp their last breath of exit code to their parent and have their memory wiped from the face of the system. The problem is the parent isn’t cooperating. It’s conceivable that this ignorance of its child’s death is intentional, but it is rare for a zombie condition to persists by design. If you see a zombie process and it doesn’t clear itself up in a moment, there is a good chance you’ll need to take matters into your own hands.. or you know, just ignore it.

    Using pstree we can find child pids if we know the parent, but how can we find the parent pid number from a child pid?

    Finding your own parent PID is easy in bash, it’s stored in the PPID variable.

    user@host:~$ echo $PPID
    5828

    What about finding the parent of an arbitrary process ID? If you have the proc file system (you probably do), you can see lots of information about a given process including the parent pid by looking at the ‘stat’ file for that pid.

    root@host:~# cat /proc/6124/stat
    6124 (bash) S 5828 6124 5828 34820 6398 4202496 1166 3867 0 0 4 0 0 1 20 0 1 0 7883109 25640960 617 18446744073709551615 4194304 5111244 140736553088608 140736553087152 140358224629054 0 65536 3686404 1266761467 18446744071579277349 0 0 17 0 0 0 0 0 0

    The 4th value in the ‘stat’ file is ppid, or the “parent pid” of the process.

    The ‘stat’ file for any pid in a procfs enabled system can be found in /proc/[pid]/stat, where [pid] is replaced with the pid number you are interested in. For a description of the ‘stat’ file format search for ‘/proc/[pid]/stat’ at the URL below:
    http://www.kernel.org/doc/man-pages/online/pages/man5/proc.5.html

    To see just the pid number and ignore the other information we’re not currently interested in we can use the ‘awk’ command to select only the 4th field.

    root@host:~# awk ‘{print $4}’ /proc/6124/stat
    5828

    Armed with the information above, I’ve created a quick little zombie hunting script for use in the cron scheduler, or command line. The script first tries to alert the parent process to reap its child using the SIGCHLD signal. When SIGCHLD fails SIGKILL is used next.

    Zombie Hunter

    #!/bin/bash
    zombies=(`ps ax |awk ‘{print $3" "$1}’ |grep -e ^‘Z ‘ |sed ‘s/Z //1’`)
    for zombie in ${zombies[@]}
    do
        echo "Found a zombie process "`awk ‘{print $2}’ /proc/$zombie/stat`" [pid:$zombie]"
        parent="`awk ‘{print $4}’ /proc/$zombie/stat`"
        echo "Asking parent process "`awk ‘{print $2}’ /proc/$parent/stat`" [pid:$parent] to come quietly…"
        kill -SIGCHLD $parent
        sleep 10 # This seems awfully patient
        if [ -f /proc/$parent/stat ]; then
            echo "Asking not so nicely"
            kill -9 $parent
        fi
        sleep 1
        if ! [ -f /proc/$zombie/stat ]; then
            echo "Zombie vanquished"
        fi
    done
    root@host:~# ./zombie-hunter
    Found a zombie process (apt) [pid:28766]
    Asking parent process (run-parts) [pid:28763] to come quietly…
    Asking not so nicely
    Zombie vanquished
  • Reset Buffalo TeraStation PRO Model TS-RHTGL/R5 Password

    Reset Buffalo TeraStation PRO Model TS-RHTGL/R5 Password

    Have a Buffalo TeraStation PRO Model TS-RHTGL/R5 and lost your password? Me too, here’s how I reset the web interface login without losing all my data. The steps will probably be similar on other TeraStation models, but I think the default user credentials might be different (username ‘Administrator’ vs. ‘admin’, etc). The TeraStation this was tested on is a TS-RHTGL/R5 running firmware version 1.30. Make a note of your device’s existing IP address. After I reset mine it switched to DHCP configuration. This isn’t a big deal (provided you have a DHCP server) as the new IP address is easily found through the LCD status window on the TeraStation. Luckily the majority (all?) other configuration details: NTP, SMTP, email address, Active Directory settings, etc appear to have been preserved. Before following these instructions you might want to start with trying the default login credentials:

    Username: admin
    Password: password

    Remove the Bezel

    In order to reset the password you’ll need to remove the front bezel. If you are lucky enough to know where your key is or had the foresight to leave your TeraStation unlocked you can skip ahead.

    As expected the tubular lock (Also called Chicago or Ace lock) that keeps the face secured to the TeraStation is a cheap one. It has a smaller diameter than common tubular locks and only appears to have 4 pins vs. the more typical 7 or 8 pin varieties. After trying destroying several disposable pens I was able to find one that would work as a make-shift pick for this purpose. Instead of using the exterior shaft of the pen like the infamous Kryptonite bike lock exploit, the smaller diameter of this lock requires a smaller diameter bit of soft plastic. You might be thinking:

    “Locks aren’t designed to have all the pins pushed to maximum depths in order to be unlocked, they require specific depths for each pin position and hence a specific key”.

    Normally you would be correct, but as I said, this is a very cheap lock. After trying several disposable pens I ended up using a “BiC SOFT Feel Med.” which worked great. Disassemble the pen and remove the ink cartridge and comfort grip from the business-end of the pen. The backside of the piece we are interested in (circled in red below) is a good fit for the diameter of the lock. I was able to lock and unlock the TeraStation several times with this bit of plastic with little effort.

    Reset the Password

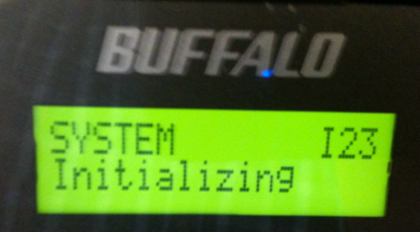
    Now that the bezel is off, look at underside of the display panel on the left-hand side. Press and hold the red button until the display reads “SYSTEM Initializing”. The TeraStation will start beeping, the beeps will continue for 30 or 40 seconds.

  • Install Asterisk 1.8 from source on Ubuntu 11.10

    Install Asterisk 1.8 from source on Ubuntu 11.10

    After a fresh install of Ubuntu 11.10 I needed to install asterisk again, so I figured I’d make some notes for the next time I have to do it.

    I’m using Asterisk 1.8 rather than the latest bleeding edge because 1.8 has long term support until 2015-10-21 where as the 10.x branch is end of life 2013-10-12. I have too many other things to do these days than reconfigure asterisk, figure out which of my third party add-ons work, etc every time there is an update.

    Since this is a new install, I’m updating the package list and all my files that might be out of date

    apt-get update
    apt-get upgrade

    Make sure kernel headers are installed

    apt-get install linux-headers-`uname -r`

    Grab a bunch of packages for building asterisk, dependencies, compilers, etc

    apt-get install build-essential # Compiler
    apt-get install libxml2-dev # Required
    apt-get install libncurses5-dev libreadline-dev libreadline6-dev  # Termcap stuff
    apt-get install libiksemel-dev # For Google Talk support
    apt-get install libvorbis-dev  # For Ogg Vorbis format support
    apt-get install libssl-dev # Needed for SIP
    apt-get install libspeex-dev libspeexdsp-dev  # For speex codec
    apt-get install mpg123 libmpg123-0 sox openssl wget subversion openssh-server # Odds and ends

    Switch into /usr/src directory as a place to build the source from

    cd /usr/src

    Downloaded and untar DAHDI. I don’t have any Digium hardware in this computer, but I wanted the DAHDI pseudo timing source for MeetMe conferences.

    wget http://downloads.asterisk.org/pub/telephony/dahdi-linux/releases/dahdi-linux-2.6.0.tar.gz
    tar -zxvf dahdi-linux-2.6.0.tar.gz

    Move into the build directory, compile and install DAHDI

    cd dahdi-linux-2.6.0/
    make
    make install
    cd ..

    Download and untar Asterisk

    wget http://downloads.asterisk.org/pub/telephony/asterisk/releases/asterisk-1.8.10.1.tar.gz
    tar -zxvf asterisk-1.8.10.1.tar.gz

    Move into the build directory

    cd asterisk-1.8.10.1/

    Add mp3 support

    ./contrib/scripts/get_mp3_source.sh

    Run the configure script

    ./configure

    If everything works out, you should get the ascii art Asterisk logo

                   .$$$$$$$$$$$$$$$=..      
                .$7$7..          .7$$7:.    
              .$$:.                 ,$7.7  
            .$7.     7$$$$           .$$77  
         ..$$.       $$$$$            .$$$7
        ..7$   .?.   $$$$$   .?.       7$$$.
       $.$.   .$$$7. $$$$7 .7$$$.      .$$$.
     .777.   .$$$$$$77$$$77$$$$$7.      $$$,
     $$$~      .7$$$$$$$$$$$$$7.       .$$$.
    .$$7          .7$$$$$$$7:          ?$$$.
    $$$          ?7$$$$$$$$$$I        .$$$7
    $$$       .7$$$$$$$$$$$$$$$$      :$$$.
    $$$       $$$$$$7$$$$$$$$$$$$    .$$$.  
    $$$        $$$   7$$$7  .$$$    .$$$.  
    $$$$             $$$$7         .$$$.    
    7$$$7            7$$$$        7$$$      
     $$$$$                        $$$      
      $$$$7.                       $$  (TM)    
       $$$$$$$.           .7$$$$$$  $$      
         $$$$$$$$$$$$7$$$$$$$$$.$$$$$$      
           $$$$$$$$$$$$$$$$.

    Optionally choose asterisk components to be installed

    make menuconfig

    Build the binaries

    make

    Copy the files to the right places

    make install

    Optionally copy the sample configs into /etc/asterisk

    make samples

    Copy the init startup scripts to make asterisk start on boot

    make config

    And you’re done.