Category: General Nonsense

General topics and discussion

  • Fun with Garmin Forensics

    Fun with Garmin Forensics

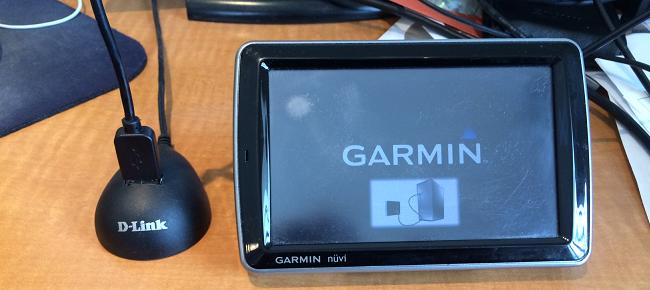
    As you’ll recall from my Christmas post the company I work for is replacing their fleet management equipment, and in part that means upgrading some of our older Garmin GPS screens. As a result a steady stream of old equipment has been trickling into my office.

    old_garmins

    Even though these units no longer fit our needs, there is still plenty of life left to them.

    Science!

    Wikipedia states that “forensic science is the scientific method of gathering and examining information about the past“, our methods might not be too scientific, but these devices are chock-full of information about the past.

    In preparation for finding them new homes, I thought it might be wise to see what kind of private data these things have stored. I came across a nice overview presentation on GPS forensics that covers a variety of models and brands. That presentation listed some files of interest:

    Current.gpx
    Archive.gpx
    Position.gpx
    GarminDevice.xml

    After connecting the Garmin to a computer and waiting for the Garmin’s operating system to start I was able to see the Garmin as a storage device.

    garmin_usb

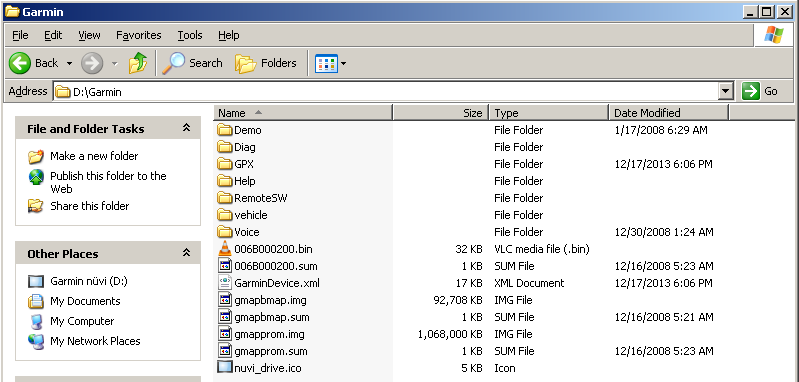
    Navigating to the \Garmin\GPX directory I was able to locate Current.gpx.
    garmin_nuvi_5000_mass_storage

    garmin_nuvi_5000_root_folder

    garmin_nuvi_5000_garmin_folder

    garmin_nuvi_5000_gpx_folder

    GPX Format

    The GPX in the GPX file format stands for GPS eXchange Format. It’s a fairly simple XML format with plenty of human readable items of interest. Here are some (slightly sanitized) snippets from the GPX file I recovered to give you an idea of the format. The file I was working with was devoid of line breaks, but I’ve added some here for clarity.

    After a quick header we get into some more interesting stuff.

    <?xml version="1.0" encoding="UTF-8" standalone="no" ?>
    <gpx xmlns="http://www.topografix.com/GPX/1/1" xmlns:gpxx="http://www.garmin.com/xmlschemas/GpxExtensions/v3" xmlns:gpxtpx="http://www.garmin.com/xmlschemas/TrackPointExtension/v1" creator="nĂ¼vi 5000" version="1.1" xmlns:xsi="http://www.w3.org/2001/XMLSchema-instance" xsi:schemaLocation="http://www.topografix.com/GPX/1/1 http://www.topografix.com/GPX/1/1/gpx.xsd http://www.garmin.com/xmlschemas/GpxExtensions/v3 http://www.garmin.com/xmlschemas/GpxExtensionsv3.xsd http://www.garmin.com/xmlschemas/TrackPointExtension/v1 http://www.garmin.com/xmlschemas/TrackPointExtensionv1.xsd">

    The “metadata” section seems pretty boring. I think the time listed here is the last time the unit was used.

    <metadata>
     <link href="http://www.garmin.com">
      <text>Garmin International</text>
      </link>
      <time>2014-01-16T21:44:20Z</time>
    </metadata>

    Now on to some good stuff, Waypoints.

    <wpt lat="23.137160" lon="-81.687469">
      <ele>241.17</ele>
      <name>001</name>
      <sym>Waypoint</sym>
    </wpt>

    Some Waypoint entries contain “extensions”, these might include Address Book entries

    <extensions>
     <gpxx:WaypointExtension>
      <gpxx:Categories>
        <gpxx:Category>Address Book</gpxx:Category>
      </gpxx:Categories>

    Or just addresses

    <extensions>
     <gpxx:WaypointExtension>
      <gpxx:Address>
        <gpxx:StreetAddress>101 W. Flagler St</gpxx:StreetAddress>
        <gpxx:City>Miami</gpxx:City>
        <gpxx:State>FL</gpxx:State>
        <gpxx:Country>USA</gpxx:Country>
        <gpxx:PostalCode>33130</gpxx:PostalCode>
      </gpxx:Address>
     </gpxx:WaypointExtension>
    </extensions>

    Far more interesting than the Waypoints however is the Tracks log. This data is a series of positions at a given time which leaves a trail of breadcrumbs which we can use to reconstruct the journey.

    Here is part of one particular journey

    <trk>
      <name>ACTIVE LOG: 08 JAN 2014 12:06</name>
       <trkseg>

    After the “trkseg” element begins a series of coordinates, elevations, and times follow

    <trkpt lat="23.884920" lon="-81.686757">
      <ele>196.25</ele>
      <time>2014-01-08T17:06:41Z</time>
    </trkpt>
    <trkpt lat="23.884317" lon="-81.686580">
      <ele>196.73</ele>
      <time>2014-01-08T17:06:43Z</time>
    </trkpt>
    <trkpt lat="23.884317" lon="-81.686580">
      <ele>196.73</ele>
      <time>2014-01-08T17:06:44Z</time>
    </trkpt>
    <trkpt lat="23.884317" lon="-81.686580">
      <ele>196.73</ele>
      <time>2014-01-08T17:06:45Z</time>
    </trkpt>

    …And so on

    Google Earth

    As you can see this information is easy to work with to suit your needs. If your needs are just to watch what happened and when, Google Earth is great tool for this. It turns out Google Earth already understands the GPX format, so we don’t need to extract any data manually.

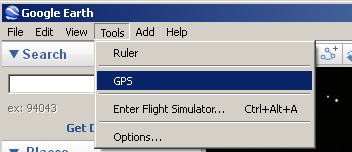
    Just click on Tools then GPS
    google_earth_import_1

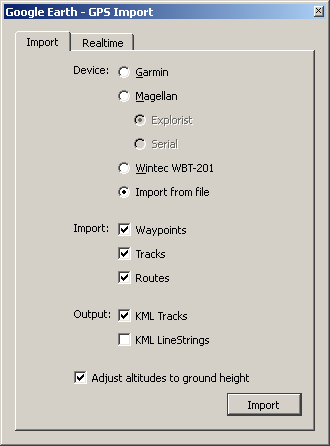
    Select the Import from file option followed by the Import button
    google_earth_import_2

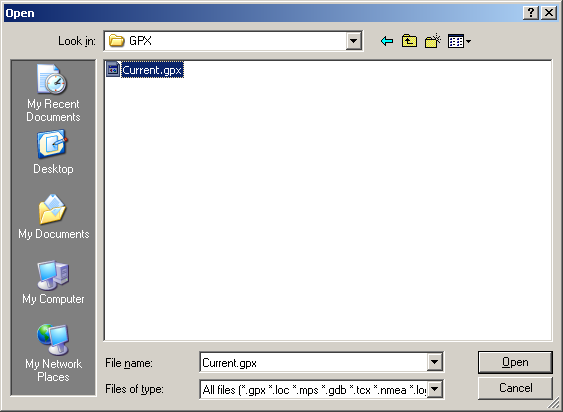
    Navigate to your Current.gpx file (in my case \Garmin\GPX), select it and click Open
    google_earth_import_3

    Google Earth will tell you what data it was able to find. Click OK
    google_earth_import_4

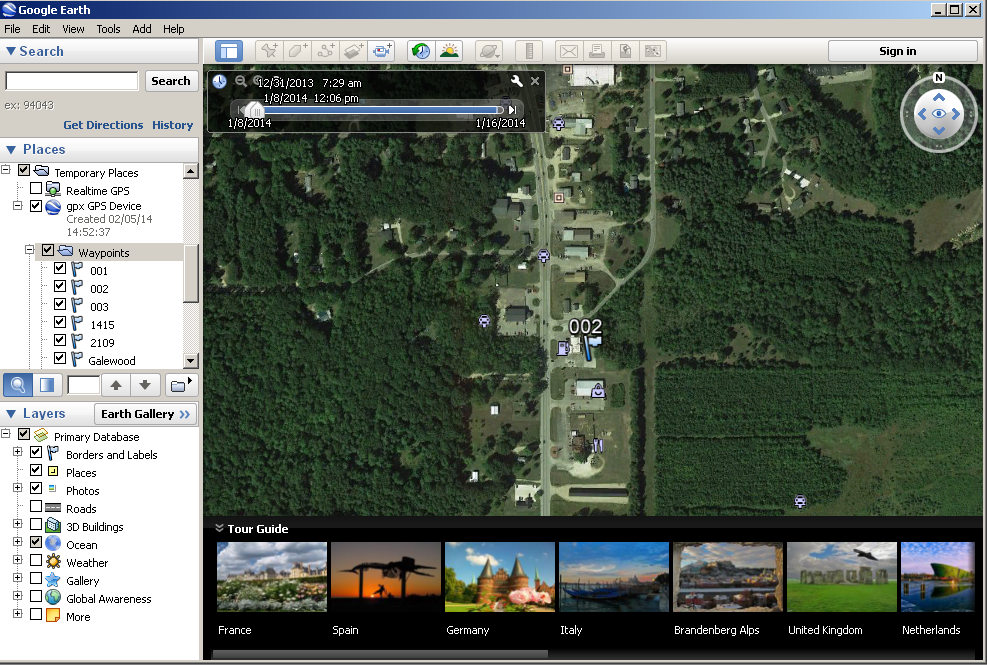
    On the left panel you can move between waypoints to see them on the map.
    google_earth_view_imported_2

    Fun

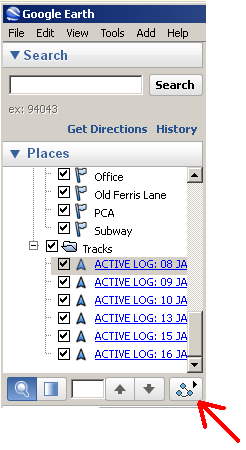
    For even more fun, select one of the “Tracks” logs, and click the play button with breadcrumb icon (I assume that’s what that is anyhow).
    google_earth_view_imported_3

    Here is some sample video I captured from the playback of some track log data. The data isn’t real-time of course (that would be boring), but there is still some relevant timing preserved. Notice how you can even tell which stop lights were red by the time elapsed between movements. Very interesting and potentially revealing stuff.


  • Garland  & Garmin Greetings

    Garland & Garmin Greetings

    My office at work wasn’t feeling very Christmas-like, so I flaked out a little and hatched a plan to address the stark lack of festiveness.

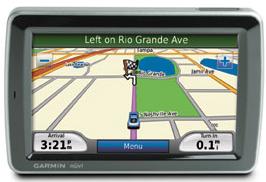
    I have a bunch of these old Garmin Nuvi 5000 model GPS displays in my office right now.

    garmin_5000

    We are replacing our fleet management software and with it our vehicle tracking system.

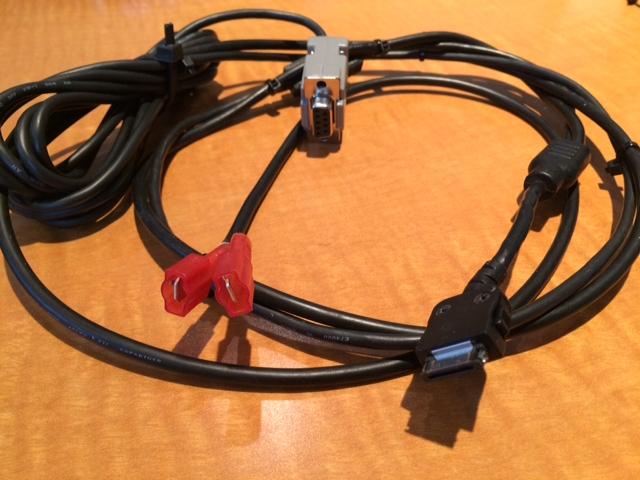
    Both the old and the new system have the ability to connect to Garmin GPS displays via FMI cable in order to push waypoints and information to the driver. Unfortunately the Garmin Nuvi 5000 displays are kind of old at this point, the FMI interface isn’t compatible with our new system (hence a pile of GPS screens on my desk). This cable previously wired in to the vehicle accessory power.

    garmin_fmi_serial

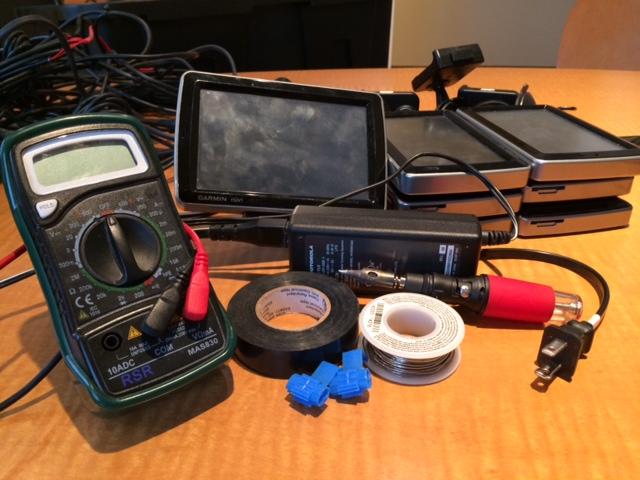
    I compiled a pile of useful ingredients.
    christmas_tools

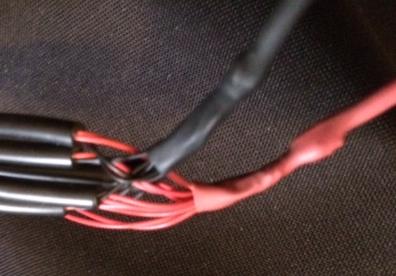
    I twisted the power wires of the FMI cables together, soldered it up to some spare wire, and covered it with some shrink tube.
    fmi_twisted

    fmi_twisted_soldered

    Using the multimeter I measured the current of one of the Garmin displays, it fluctuated a bit as the system booted up and looked for satellites, but it seemed to stay pretty well under 150mA. I ended up using 6 Garmins, so figure maybe 900mA, add some buffer room, and I decided that this 12 volt DC 2 Amp power supply would be a good donor.

    garmin_xmas_power

    The whole time I had Garmin’s commerical jingles stuck in my head.

    Peace & Joy

  • Reset Buffalo TeraStation PRO Model TS-RHTGL/R5 Password

    Reset Buffalo TeraStation PRO Model TS-RHTGL/R5 Password

    Have a Buffalo TeraStation PRO Model TS-RHTGL/R5 and lost your password? Me too, here’s how I reset the web interface login without losing all my data. The steps will probably be similar on other TeraStation models, but I think the default user credentials might be different (username ‘Administrator’ vs. ‘admin’, etc). The TeraStation this was tested on is a TS-RHTGL/R5 running firmware version 1.30. Make a note of your device’s existing IP address. After I reset mine it switched to DHCP configuration. This isn’t a big deal (provided you have a DHCP server) as the new IP address is easily found through the LCD status window on the TeraStation. Luckily the majority (all?) other configuration details: NTP, SMTP, email address, Active Directory settings, etc appear to have been preserved. Before following these instructions you might want to start with trying the default login credentials:

    Username: admin
    Password: password

    Remove the Bezel

    In order to reset the password you’ll need to remove the front bezel. If you are lucky enough to know where your key is or had the foresight to leave your TeraStation unlocked you can skip ahead.

    As expected the tubular lock (Also called Chicago or Ace lock) that keeps the face secured to the TeraStation is a cheap one. It has a smaller diameter than common tubular locks and only appears to have 4 pins vs. the more typical 7 or 8 pin varieties. After trying destroying several disposable pens I was able to find one that would work as a make-shift pick for this purpose. Instead of using the exterior shaft of the pen like the infamous Kryptonite bike lock exploit, the smaller diameter of this lock requires a smaller diameter bit of soft plastic. You might be thinking:

    “Locks aren’t designed to have all the pins pushed to maximum depths in order to be unlocked, they require specific depths for each pin position and hence a specific key”.

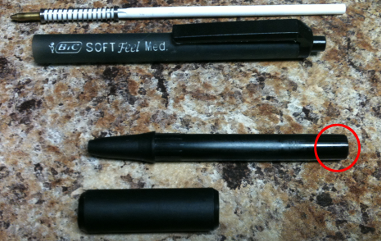
    Normally you would be correct, but as I said, this is a very cheap lock. After trying several disposable pens I ended up using a “BiC SOFT Feel Med.” which worked great. Disassemble the pen and remove the ink cartridge and comfort grip from the business-end of the pen. The backside of the piece we are interested in (circled in red below) is a good fit for the diameter of the lock. I was able to lock and unlock the TeraStation several times with this bit of plastic with little effort.

    Reset the Password

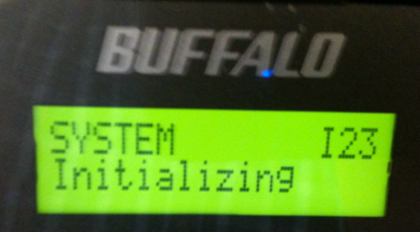
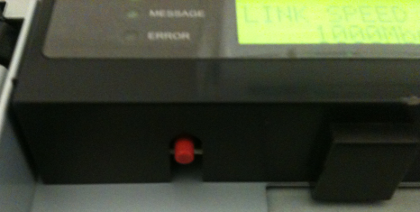
    Now that the bezel is off, look at underside of the display panel on the left-hand side. Press and hold the red button until the display reads “SYSTEM Initializing”. The TeraStation will start beeping, the beeps will continue for 30 or 40 seconds.

  • De-ActiveX-ifying an ActiveX Component

    Some ActiveX components add “enhancement” to the browser by dropping in custom controls for forms or other fanciness. Those types of components require the browser, because they augment the user’s experience within the browser. Other ActiveX components are little more than a standalone executable that can get it’s command line arguments from the web page that serves it. This article is about my experience separating out such an executable from it’s ActiveX constructs and using it without Internet Explorer.

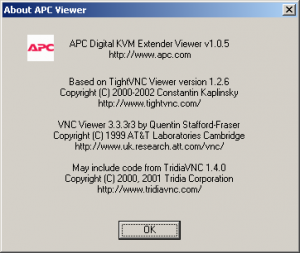
    I have an old APC AP5456 IP Gateway for Analog KVM, it’s a neat little device other than it’s insistence that I use Internet Explorer. It uses an ActiveX component to view the remote consoles. It’s based on VNC, and has some encryption of the RFB data added in. The device listens on port 80 (http) and 5900 (VNC). If I had any doubt after seeing the port number, it was cleared up in the “About…” dialog.

    Unfortunately, I couldn’t just use a regular VNC client to connect. The authentication process has been removed from the VNC-side of things and moved to the web page. When you authenticate to the web page of the IP KVM, it gives the ActiveX component an authentication token which is used to view the console of the computer it’s connected to.

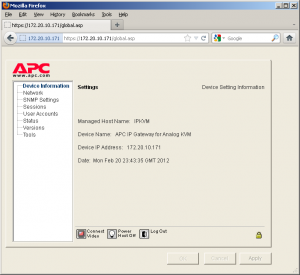
    When you first login using a web browser you’re shown several options. The one we’re interested in is “Connect Video”

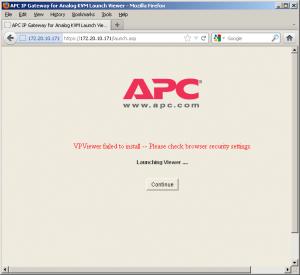
    After clicking “Connect Video” we’re taken to another screen where the ActiveX component should normally be launched. I’m using Firefox in this screenshot so it fails. Most browsers other than Internet Explorer have no idea what to do with ActiveX (and rightfully so).

    This page will meta refresh back to the previous page, so quickly select the option to view the source (Control+u in Firefox).

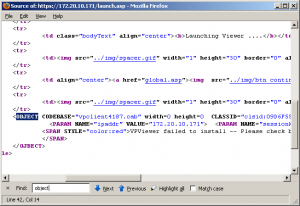
    I searched the page for the <OBJECT> tag that normally holds the ActiveX details. Here is the relevant portion.

    <OBJECT CODEBASE="vpclient4187.cab" width=0 height=0  CLASSID="clsid:09D6F55E-F235-4187-9C60-1D09CFD9FAFF">
      <PARAM NAME="ipaddr" VALUE="172.20.10.171">
      <PARAM NAME="sessionkey" VALUE="0688565E0688565EFA72032A87995D28" >
      <PARAM NAME="encryptionkey" VALUE="68F0585E68F0585E6BBA4AE3E6EF95FA">
    </OJBECT>

    The first thing to notice is the vpclient4187.cab cabinet file. Unpacking the cab file gives us AvocentHTTP.dll, vpfilexfer.dll, launchEXE.dll, vpclient.inf, vpclient.exe, and vpclient.dll. Awesome! It’s probably just that vpclient.exe I need to run right?

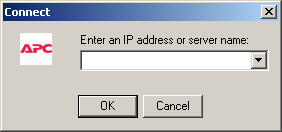
    Well, no, unfortunately typing in the IP address of our IP KVM appliance into the dialog doesn’t result in a connection. We need that authentication token and encryption key to be included in the picture. It still seems very likely that vpclient.exe is what we want, but there’s more configuration that it clearly needs. Since there are no other settings in the dialog of vpclient.exe to adjust, we’ll optimistic assume those missing requirements are passed to it by the command line. The information could be passed to it by Windows messages, after all it’s not the first thing that gets called from the web browser. Looking at the contents of the INF file shows that launchEXE.dll matches the CLASSID of our object codebase. That dll probably gets all the details and hands it off to vpclient.exe. Before we freak out, lets try to keep it simple.

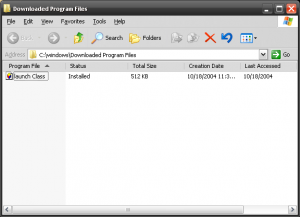
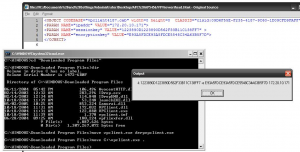
    I wrote a little program to display a message box with the contents of any command line arguments it receives. From a Windows XP computer with Internet Explorer I connect to the IP KVM as normal, and then close the KVM application and Internet Explorer. This causes the ActiveX object to get downloaded and cached. Cached in %WINDIR%\Downloaded Program Files to be specific. I replaced the vpclient.exe with my own application (keeping the name the same). You will need to do this from the command line however, as Windows treats the %WINDIR%\Downloaded Program Files directory in a special way, which blocks you from seeing the actual files contained in it.

    When I reopen Internet Explorer and attempt to connect with the IP KVM again, I see that my speculation was correct.

    The Session Key and the Encryption Key change frequently, and require the vpclient.exe connection to come from the same IP address that authenticated to the web browser, but if we act quickly we can start a session using the information available in view source as command line arguments to vpclient.exe.

    C:\Documents and Settings\Administrator\Desktop>vpclient.exe -k [Session Key] -e [Encryption Key]  [IP Address]

    Of course the reasonable thing to do at this point is to make a front-end client to connect to the IP KVM web page, parse out the required content, and launch vpclient.exe with our argument. I’ll leave that up to you, but if you’re interested in doing it under Linux I’ve got you covered.