Well, it’s Christmas time again. I really haven’t had a lot of blog posts since last Christmas, so my 2013 desk-decorations (deskorations?) are still fresh on my mind. I cheated this year, and didn’t stick to stuff I had on hand (although at the core is a Raspberry Pi, which the office had available).
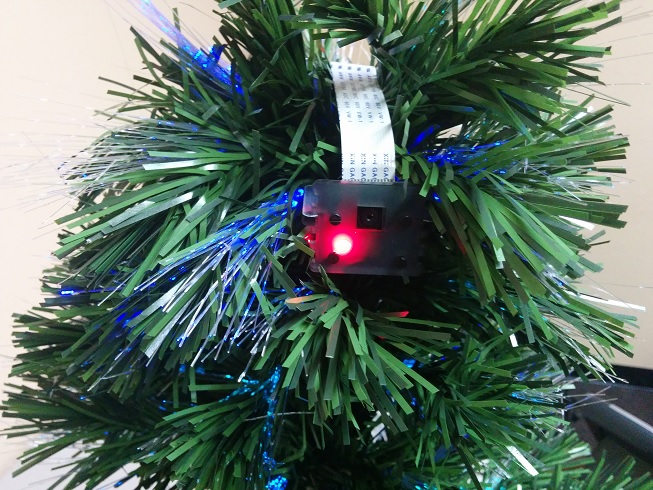
I purchased one of those cool new Raspberry Pi camera modules and stuck it in a [faux] Christmas tree. These use the Pi’s camera serial interface (CSI) port which may provide better frame rates than processing from some USB webcams. I didn’t benefit from any of that efficiency in my project, but that’s my own fault.
I used a 60 LED 1 meter “Neopixel” WS2812B series from Adafruit to decorate the folding table holding my tree and greeting cards. My coworker Eric programmed a Larson scanner sequence (think of the lights on the KITT car from the television show Knight Rider, or the cylons from Battlestar Galactica). He wrote some other sequences as well, but they were all pretty hard to capture with my camera due to the brightness of the LEDs.
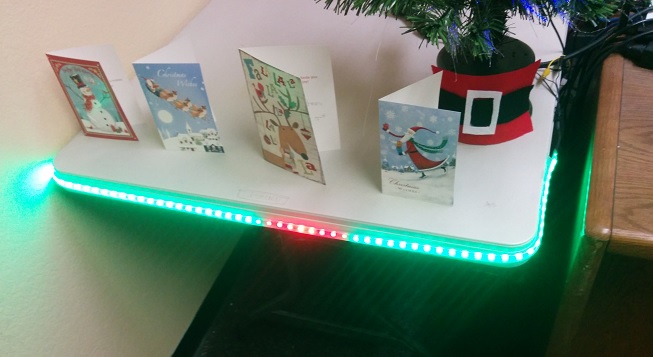
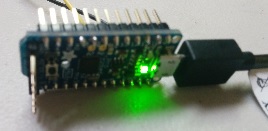
We drove these with an Arduino compatible “Trinket Pro” also from Adafruit, although they could have been driven by the Pi itself with some extra effort. The Trinket route was pretty straight forward thanks to the Adafruit Neopixel library.
A monitor connected to the Raspberry Pi displays a festive youtube video of a fire and falling snow. This 2 hour long video plays on a loop, unless it is interrupted.
While the video plays a Python script takes images from the Raspberry Pi camera module and uses OpenCV to detect faces. When a face is found a Santa hat is placed on the subject’s head (or thereabouts) and the picture is displayed to the viewer in a greeting card-esque format. The hat is scaled to fit the head of the individual subject, and multiple subjects are supported. The photos are of course saved for future embarrassment.
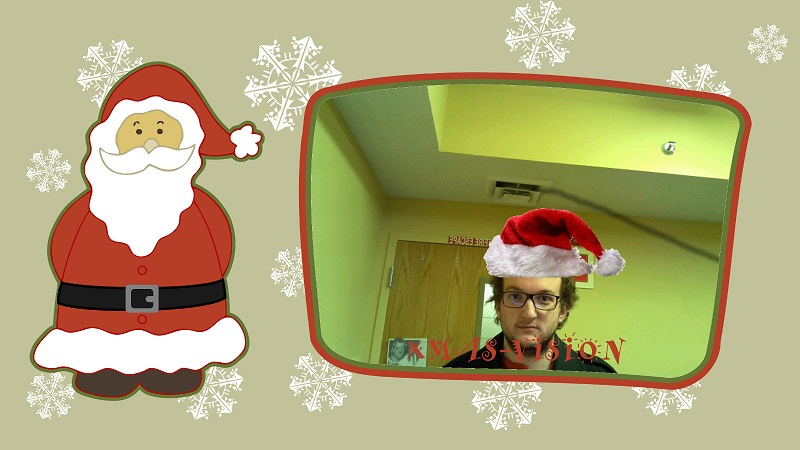
The script is ugly, and as I said earlier pretty inefficient (unnecessary disk I/O and format conversions for starters). The slowness is amplified by the limited resources available on the Pi. No doubt this can be done better, quicker, and probably as a real-time video. Here it is regardless. The background comes from scigola’s contribution over at openclipart.org (thank-you).
GitHub: https://github.com/ethertubes/santa_hatifyer
Local: santa_hatifyer.zip
#!/usr/bin/env python

# vim: tabstop=8 expandtab shiftwidth=4 softtabstop=4
import cv2
import sys
import io
import time
import picamera
import picamera.array
import os
import pygame

CAMERA_WIDTH = 640
CAMERA_HEIGHT = 480

# Taken from "Capturing to an OpenCV object"
# http://picamera.readthedocs.org/en/latest/recipes1.html

# Create the in-memory stream
stream = io.BytesIO()

face = 0
while face == 0:
    # Acquiring pic
    with picamera.PiCamera() as camera:
        camera.resolution = (CAMERA_WIDTH, CAMERA_HEIGHT)
        camera.vflip = True
        time.sleep(1)
        with picamera.array.PiRGBArray(camera) as stream:
            camera.capture(stream, format='bgr')
            # At this point the image is available as stream.array
            image = stream.array

    # Adapted from "Haar-cascade Detection in OpenCV"
    # http://docs.opencv.org/trunk/doc/py_tutorials/py_objdetect/py_face_detection/py_face_detection.html
    face_cascade = cv2.CascadeClassifier('haarcascade_frontalface_default.xml')

    # Got pic, checking for faces
    gray = cv2.cvtColor(image, cv2.COLOR_BGR2GRAY)
    faces = face_cascade.detectMultiScale(image, 1.3, 5)

    if len(faces) > 0:
        face = 1
        print "Found Face! "
        cv2.imwrite('foundface.jpg', image)

cv2.destroyAllWindows()

# driver selection routine borrowed from:
# https://web.archive.org/web/20130601053413/http://www.karoltomala.com/blog/?p=679

screen = None;

drivers = ['fbcon', 'directfb', 'svgalib']

for driver in drivers:
    if not os.getenv('SDL_VIDEODRIVER'):
        os.putenv('SDL_VIDEODRIVER', driver)
    try:
        print "trying: " + driver
        pygame.display.init()
    except pygame.error:
        print 'Driver: {0} failed.'.format(driver)
        continue
    found = True
    break

    if not found:
        raise Exception('No suitable video driver found!')

original_width = pygame.display.Info().current_w
original_height = pygame.display.Info().current_h

# match camera/image resolution
width = CAMERA_WIDTH
height = CAMERA_HEIGHT

# Use the face photo as our canvas
screen = pygame.display.set_mode((width, height))
pygame.mouse.set_visible(False)
bg = pygame.image.load('foundface.jpg')
bg = pygame.transform.scale(bg, (width, height))
screen.blit(bg, bg.get_rect())

# hat is longer on the right than the wearable
# area (because of the little puff ball) tweak
# value for your own hats
hat_offset = 330

# put the hat on the cat
if len(faces) > 0:
    for (x,y,w,h) in faces:
        hat = pygame.image.load('hat.png').convert_alpha()
        hat_size = int((hat.get_width() - hat_offset) / w)
        if hat_size < 1:
            hat_size = 1
        hat_offset = int(hat_offset * (1.0 / hat_size))
        hat = pygame.transform.scale(hat, (int(hat.get_width() * (1.0 / hat_size)), int(hat.get_height() * (1.0 / hat_size))))
        hat_w = hat.get_width()
        hat_h = hat.get_height()
        #pygame.draw.rect(screen, (255, 0, 0), (x, y - hat_h, hat_w, hat_h), 1) # hat border, helpful for debugging
        print "x: " + str(x)
        print "y: " + str(y)
        # fudge placement a little to put hat on, rather than over
        fx = int(x * 0.96)
        fy = int(y * 1.04)
        screen.blit(hat, (fx, fy - hat_h, hat_w, hat_h)) # fudge placement a little to put hat on, rather than over
        #pygame.draw.rect(screen, (0, 255, 0), (x, y, w, h), 1) # face border

# Uncomment if you want to see the intermediary face + hat photo
#pygame.display.update()
pygame.image.save(screen, 'hatted.png')

# Resize canvas to fit monitor
width = original_width
height = original_height

# load background and photo (with hat) into objects
# display background over photo, allowing transparent region to
# show the photo behind it.
screen = pygame.display.set_mode((width, height))
bg = pygame.image.load('xmascam.png').convert_alpha()
bg = pygame.transform.scale(bg, (width, height))
photo = pygame.image.load('hatted.png')
photo = pygame.transform.scale(photo, (int(1.339 * photo.get_width()), int(1.339 * photo.get_height())))
screen.blit(photo, (622, 115, photo.get_width(), photo.get_height()))
screen.blit(bg, bg.get_rect())
pygame.display.update()

time.sleep(10)
sys.exit

pygame.display.quit()
This script is ran, the photos archived, and the fire video started/stopped by the following bash script
#!/bin/bash

facewatch() {
        if ! [ -d "./archive" ]; then
                mkdir "./archive"
        fi

        while [ 1 ]
        do
                ./xmasvision.py
                stamp="$(date +%s)"
                if [ -f "foundface.jpg" ]; then
                        mv foundface.jpg ./archive/foundface_$stamp.jpg
                fi
                if [ -f "hatted.png" ]; then
                        mv hatted.png ./archive/hatted_$stamp.png
                fi
        done
}

facewatch &
while [ 1 ]
do
        # if "hatted.png" exists then the thing should display soon
        # so stop the fire video
        if [ -f "hatted.png" ]; then
                if ! [ -z "$(ps aux |grep -i omxplayer.bin |grep -v grep)" ]; then
                        killall omxplayer.bin
                fi
        fi
        # start the fire video if needed
        if [ -z "$(ps aux |grep omxplayer.bin |grep -v grep)" ]; then
                omxplayer video/Christmas\ Yule\ Log\ Fireplace\ with\ Snow\ and\ Crackling\ Fire\ Sounds\ \(HD\)-y_VD92xKS5w.mp4 &
        fi
        sleep 1
done
Happy Holidays